fbpx
Home Blog Page 105

TherVacB’s Journey Against Hepatitis B (HBV)


The development of a therapeutic vaccine for Hepatitis B (HBV) has been challenging over the past 20 years due to the virus’s impact on specific immune cells. Advancement was made with the start of TherVacB’s first human clinical trial on January 25, 2024. There are plans to start a phase 1b/2a trial for chronic HBV patients, focusing on the vaccine’s safety and efficacy across Germany, Italy, Spain, England, and Tanzania.

“TherVacB is based on a deep understanding of the challenges of the immune system in chronic HBV infection and is the result of years of dedicated research here in Munich,” says Ulrike Protzer, the leading scientist behind the vaccine. “Our approach is designed to induce exactly the type of immunity required and cover a broad spectrum of over 95% of HBV strains worldwide.” 1

This phase 1a, open-label, dose-escalation study aims to test the safety and immunogenicity of TherVacB in 24 healthy volunteers aged 18 to 65. Part I involves 11 participants receiving protein prime vaccinations on days 0 and 28, followed by an MVA-based boost on day 56. The participants are divided into three groups receiving varying doses of HEPLISAV B and HBcoreAg for prime vaccinations, and different doses of MVA-HBVac for the boost. Part II consists of 13 participants who will undergo 2 protein prime vaccinations and an MVA-based boost but with varied doses of HBsAg, HBcoreAg, and adjuvants across 3 groups.

3 Key Takeaways

  1. TherVacB represents a significant advancement in therapeutic vaccines, designed to combat HBV by enhancing the body’s immune response specifically against the virus, covering over 95% of HBV strains globally.
  2. The phase 1a trial of TherVacB focuses on its safety and immunogenicity in healthy volunteers, marking a crucial step toward understanding its efficacy in treating chronic HBV infections.
  3. The development of TherVacB is aligned with the WHO’s urgent goal to eliminate HBV as a public health threat by 2030.

TherVacB is a type of therapeutic vaccine. In contrast to prophylactic vaccines, these therapeutic vaccines are developed to treat an existing disease, like a chronic infection. These vaccines enhance the body’s immune response to combat the disease.2

“The study deciphers the effect of the individual vaccine components and provides the first direct evidence that efficient activation of HBV-specific CD4 T cells is indispensable for initiating immune control of HBV. It also determines which components are required for a successful therapeutic HBV vaccination and gives important insights into the rational design of therapeutic vaccines for the urgently needed clinical application.”3

Based on previous reporting from Contagion, The World Health Organization (WHO) has called for the elimination of HBV as a public health threat by 2030, but this progression toward elimination has stalled. Nearly 300 million people globally live with HBV, making it the most common chronic infection. Despite stable mortality rates, 2 people die from HBV every minute. 4

WHO’s goals towards eradication include preventing new infections through vaccination and improving testing, clinical management, and treatment. The Centers for Disease Control and Prevention (CDC) recommends a vaccination of 2 or 4 doses depending on the vaccine or patient’s condition. While the goal is to treat 80% of eligible individuals by 2030, only 2% have received treatment. Treatment eligibility relies on HBV DNA testing, but this test is unavailable to many. Simplifying guidelines for non-specialists is crucial to effectively care for those with HBV, given the lack of access to specialists.

All in all, the development of TherVacB fits into public health strategies for combating, prevention, testing, and treatment strategies for HBV. The estimated primary completion date for the TherVacB therapeutic vaccine study is February 2025, with the overall study expected to conclude by August 2025.

References

  1. A Heterologous Protein Prime/​MVA Boost Therapeutic Hepatitis B Vaccine Candidate. Published February 9, 2024. Accessed March 11, 2024. https://clinicaltrials.gov/study/NCT05727267?term=ThervacB&rank=1
  2. EurekAlert. Therapeutic Vaccine for Chronic Hepatitis B Enters Clinical Trial. Published February 22, 2024. Accessed March 11, 2024. https://www.eurekalert.org/news-releases/1035328
  3. Unraveling Key Determinant of Successful Therapeutic Vaccination Against Chronic Hepatitis B. Published December 22, 2022. Accessed March 11, 2024. https://www.helmholtz-munich.de/en/newsroom/news-all/artikel/unraveling-key-determinant-of-successful-therapeutic-vaccination-against-chronic-hepatitis-b
  4. Abene S. What it Will Take to Eliminate Hepatitis B Virus. Contagion. Published January 24, 2024. Accessed March 11, 2024. https://www.contagionlive.com/view/what-it-will-take-to-eliminate-hepatitis-b-virus


Source link

5 Minute Homemade Taco Seasoning Recipe

0


This website may contain affiliate links and advertising so that we can provide recipes to you. Read my disclosure policy.

This Homemade Taco Seasoning is so flavorful and takes less than 5 minutes to make. You will never buy taco seasoning from the store again!

Want to know what to make with this seasoning? Try these Taco Stuffed Peppers, this classic Taco Soup or this Rotel Dip with this homemade taco seasoning.

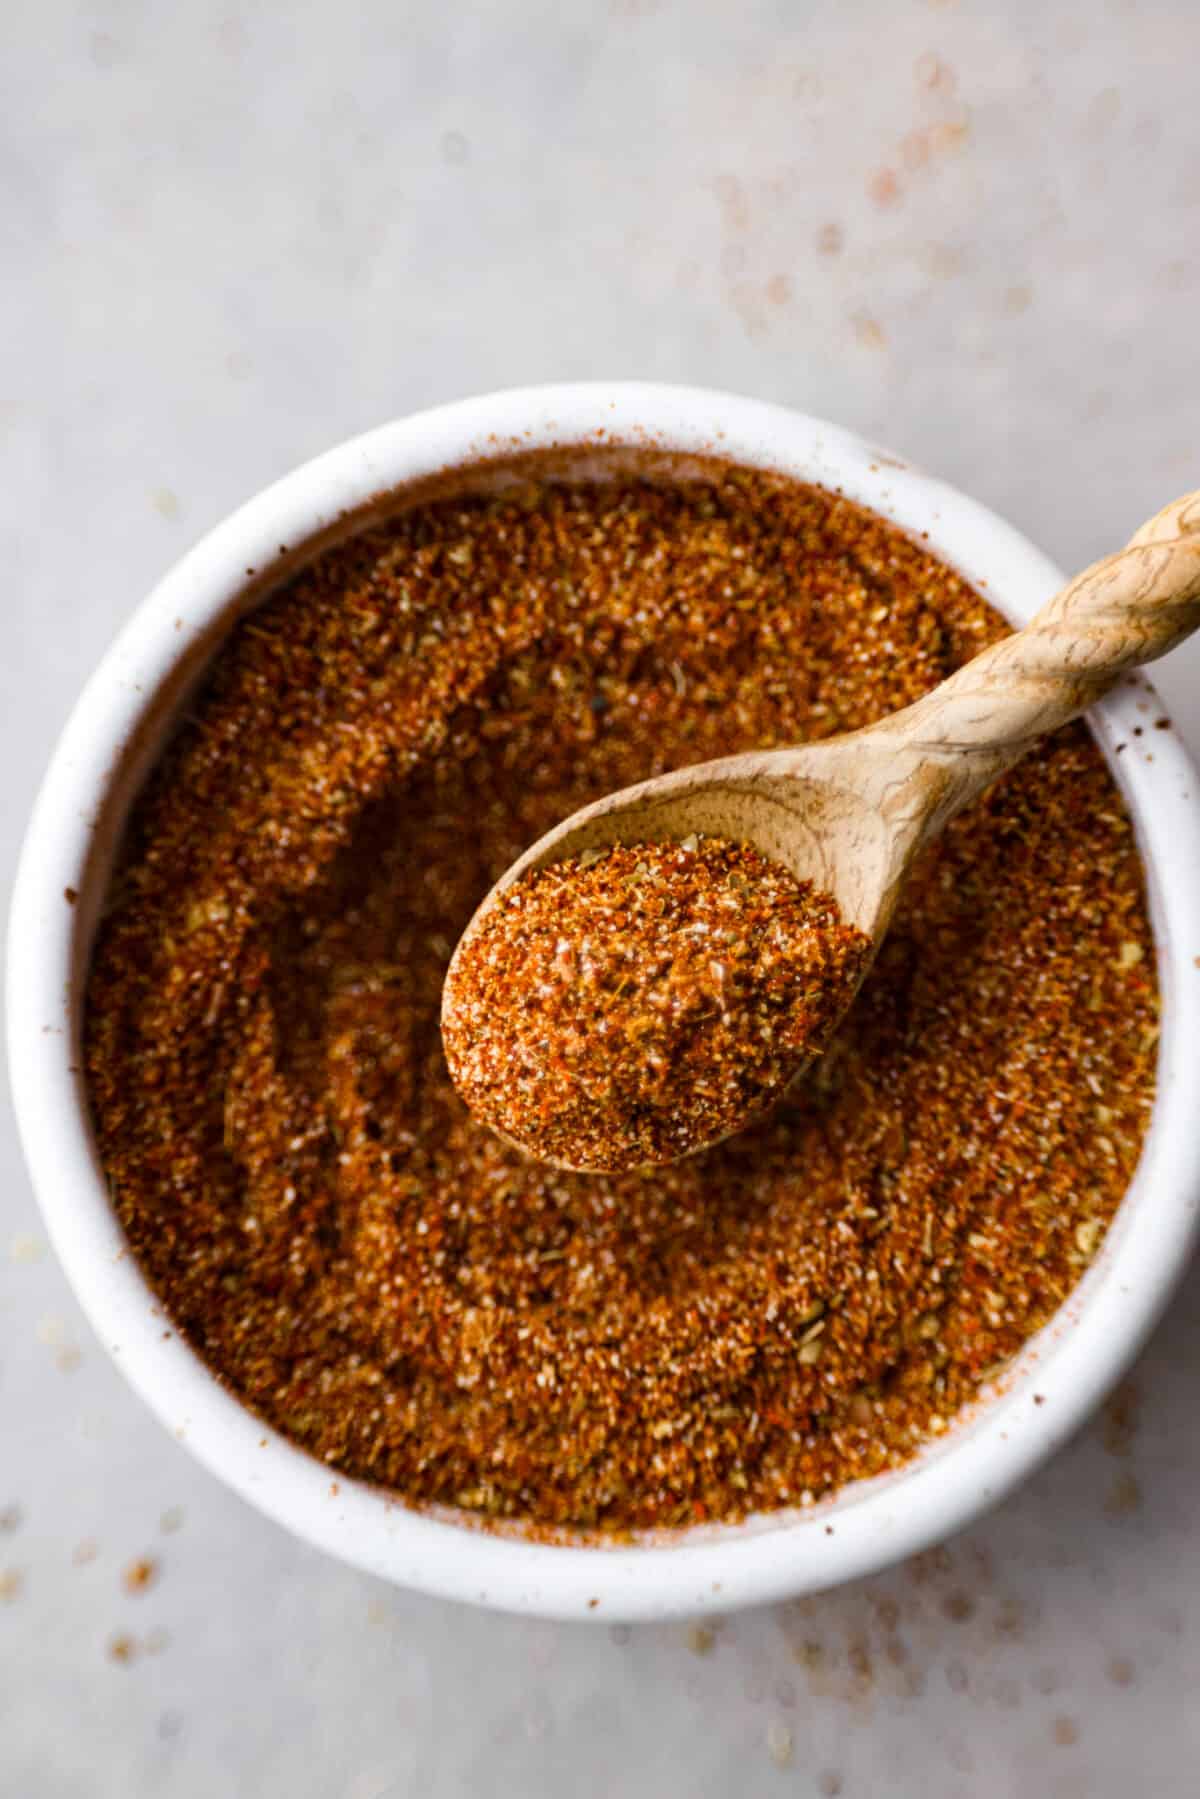
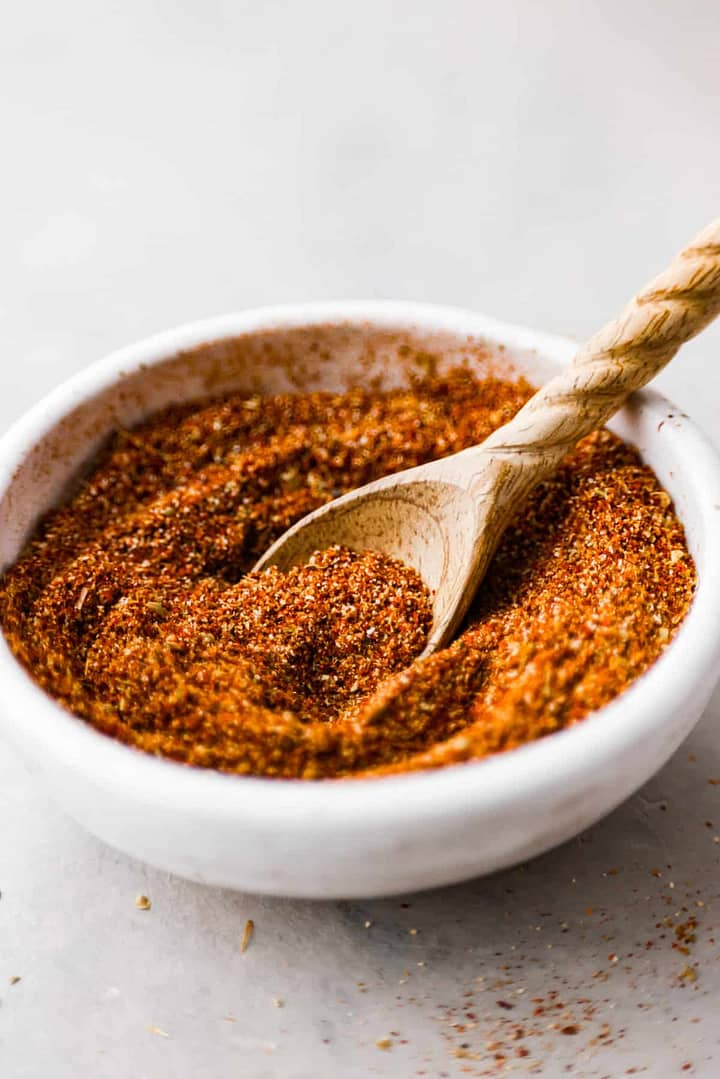
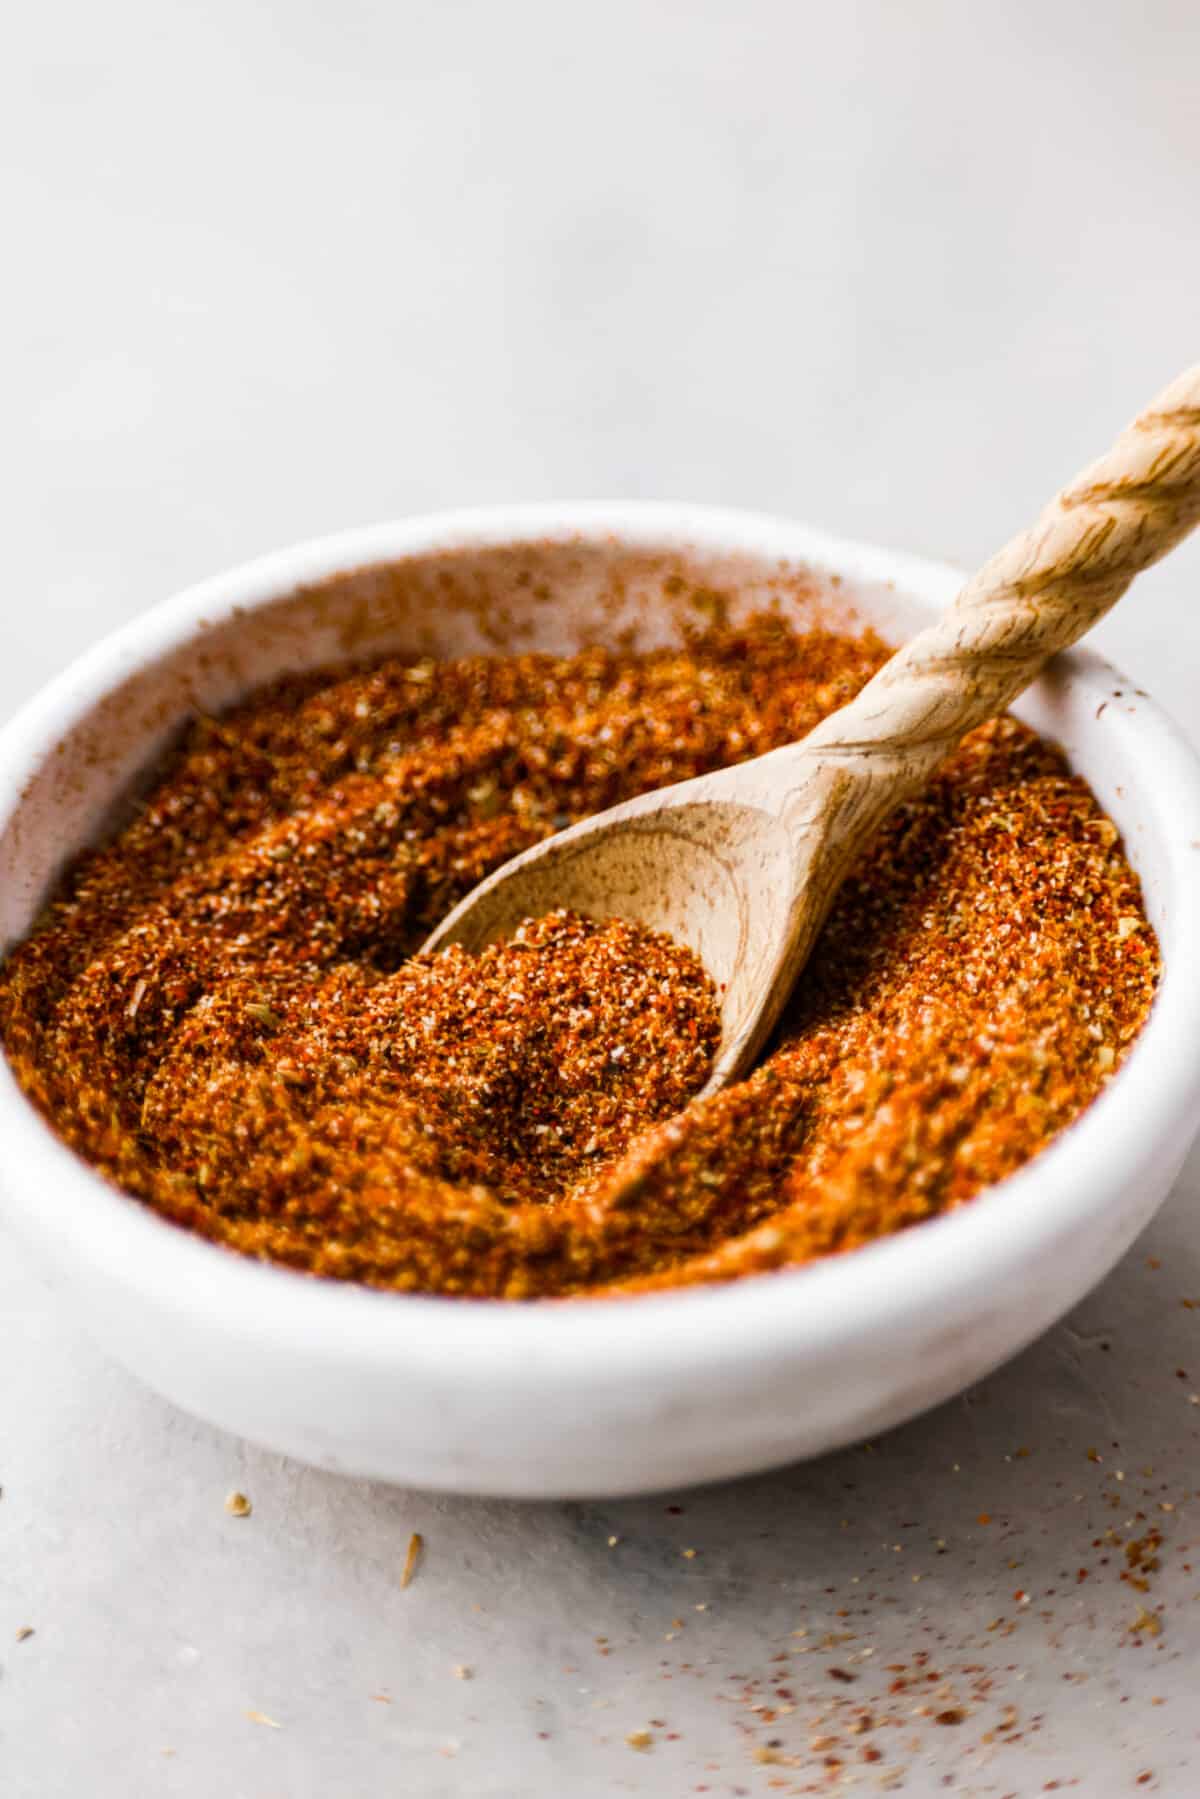
A white bowl of taco seasoning with a wooden spoon.

Taco Seasoning Recipe

Isn’t it the worst when you go to cook and don’t have the seasoning that you need for the recipe. That’s where homemade seasonings come in! If you don’t have store bought taco seasoning on hand, this recipe can be made in less that 5 minutes from classic seasonings that we all have in our pantry!

Once you try out this homemade recipe, you will never buy store bought again. These flavors make any taco have more flavor and make them taste SO much better! Try it out with this easy Taco Ring. It takes even the most simple recipe to the next level.

What is Taco Seasoning Mix Made of?

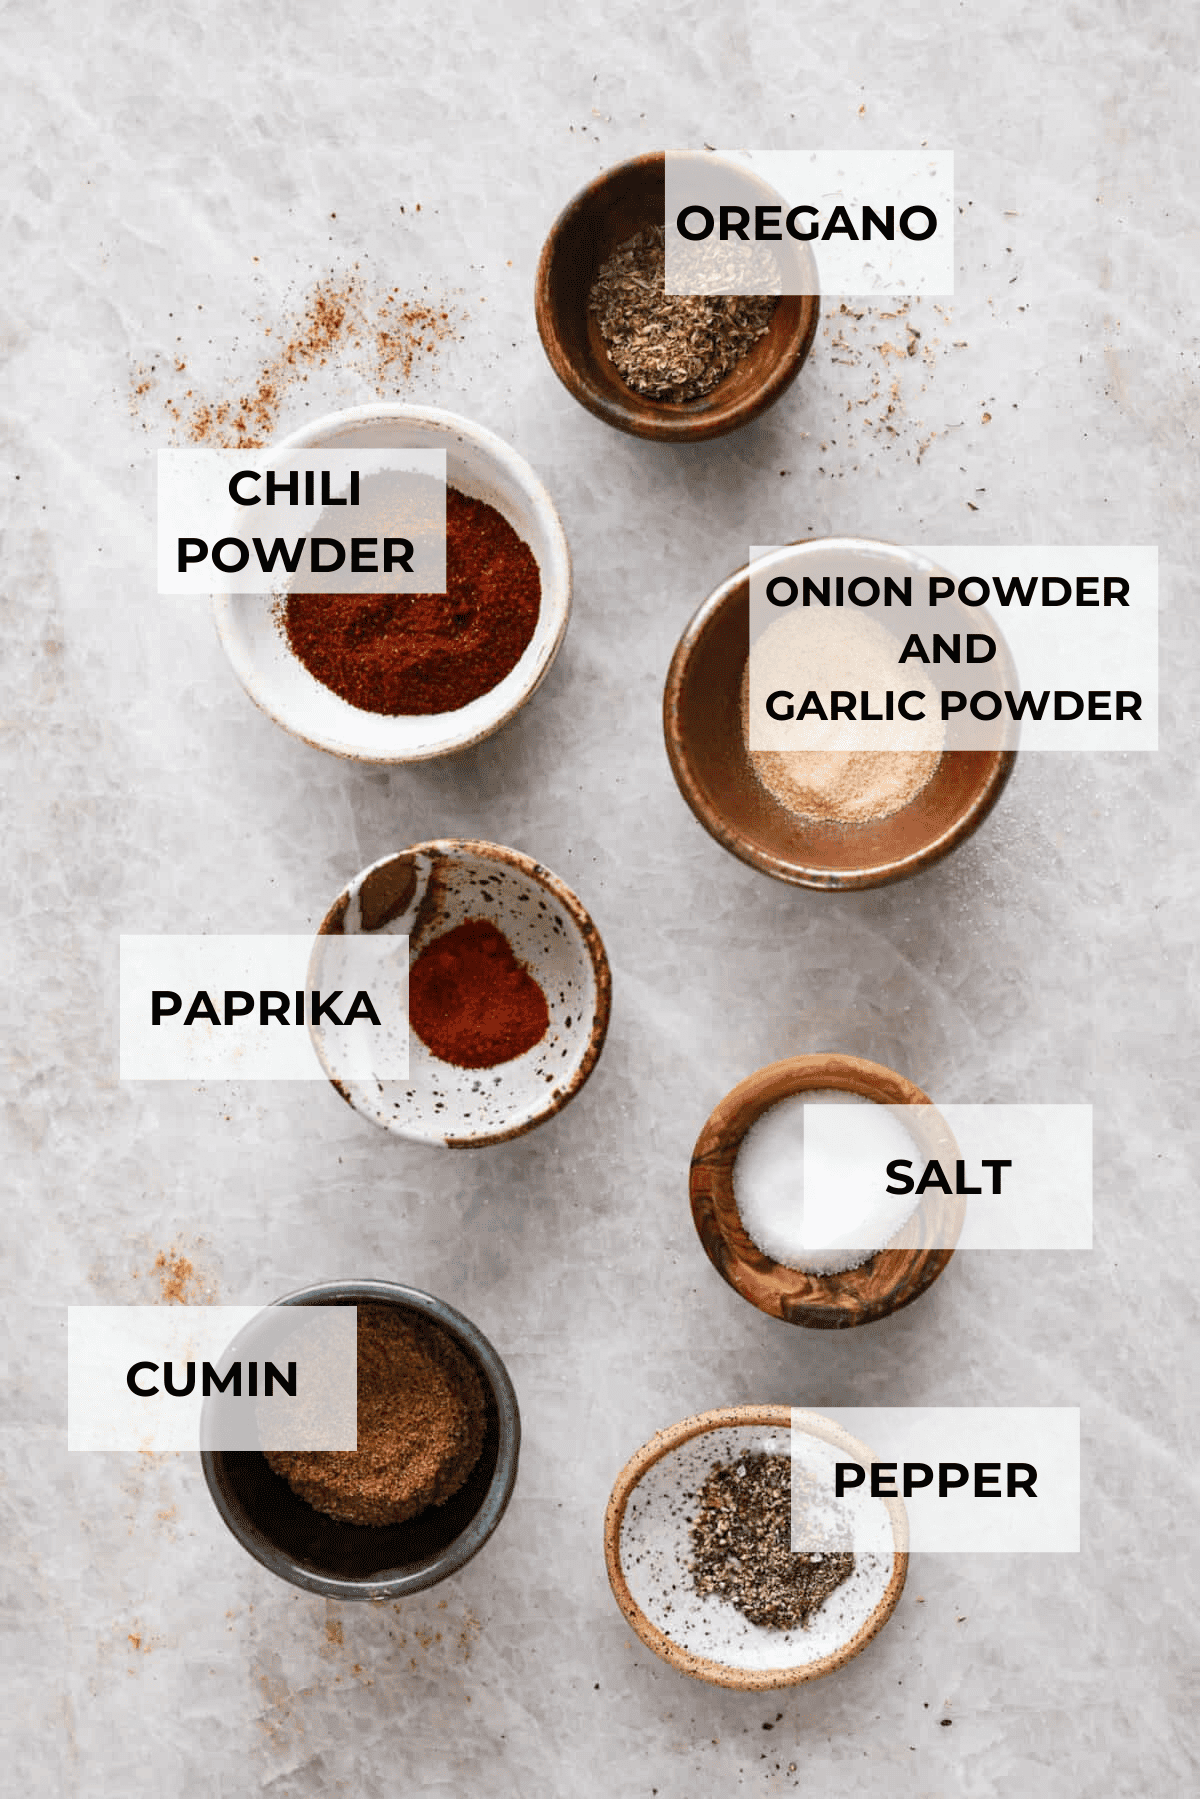
Taco Seasoning is made up of simple spices that, when they are mixed together, make the best flavor. Check out the recipe card at the bottom of the post for all of the exact measurements.

  • Chili Powder: This gives it some kick. Add more if you like your seasoning extra spicy!
  • Garlic Powder: The garlic powder complements all of the other flavors without being too overpowering.
  • Onion Powder: This is a subtle onion flavor that really stands out.
  • Dried Oregano: The oregano brings in a spicy but sweet flavoring.
  • Paprika: Paprika has a smokey flavor and helps add color to the taco seasoning.
  • Ground Cumin: This unique flavored seasoning adds lots of flavor with a little spice.
  • Salt and Black Pepper: These enhance all of the flavors in the recipe.
The top view of ingredients, each in separate bowls and labeled with what is in them.

How to Make Your Own Taco Seasoning

You can also change the flavor up to have more or less heat depending on your preference. That’s the beauty of homemade seasonings, you can customize them to be however you want!

  1. Mix spices together: Combine all the seasonings together in a bowl.
  2. Store: Place the mixture in an airtight container.

How much homemade taco seasoning equals one packet?

A standard store-bought packets of taco seasoning holds about 2 tablespoons of seasoning.

The top view of taco seasoning in a bowl with a wooden spoon scooping out some seasoning.

How much taco seasoning for 1 pound of meat?

I use about 2 tablespoons in one pound of ground turkey or ground beef. This is such a simple recipe and it all comes together quick and easy for you to make several taco dishes! The recipe can easily be doubled and use more or less to taste.

Tip: I also like to add 1/2 cup of water to the meat and seasonings to make the meat more moist.

How long does taco seasoning last?

This is the best part! When you store your seasoning, make sure to keep it in a cool, dry place in an airtight container and it will last up to 6 months.

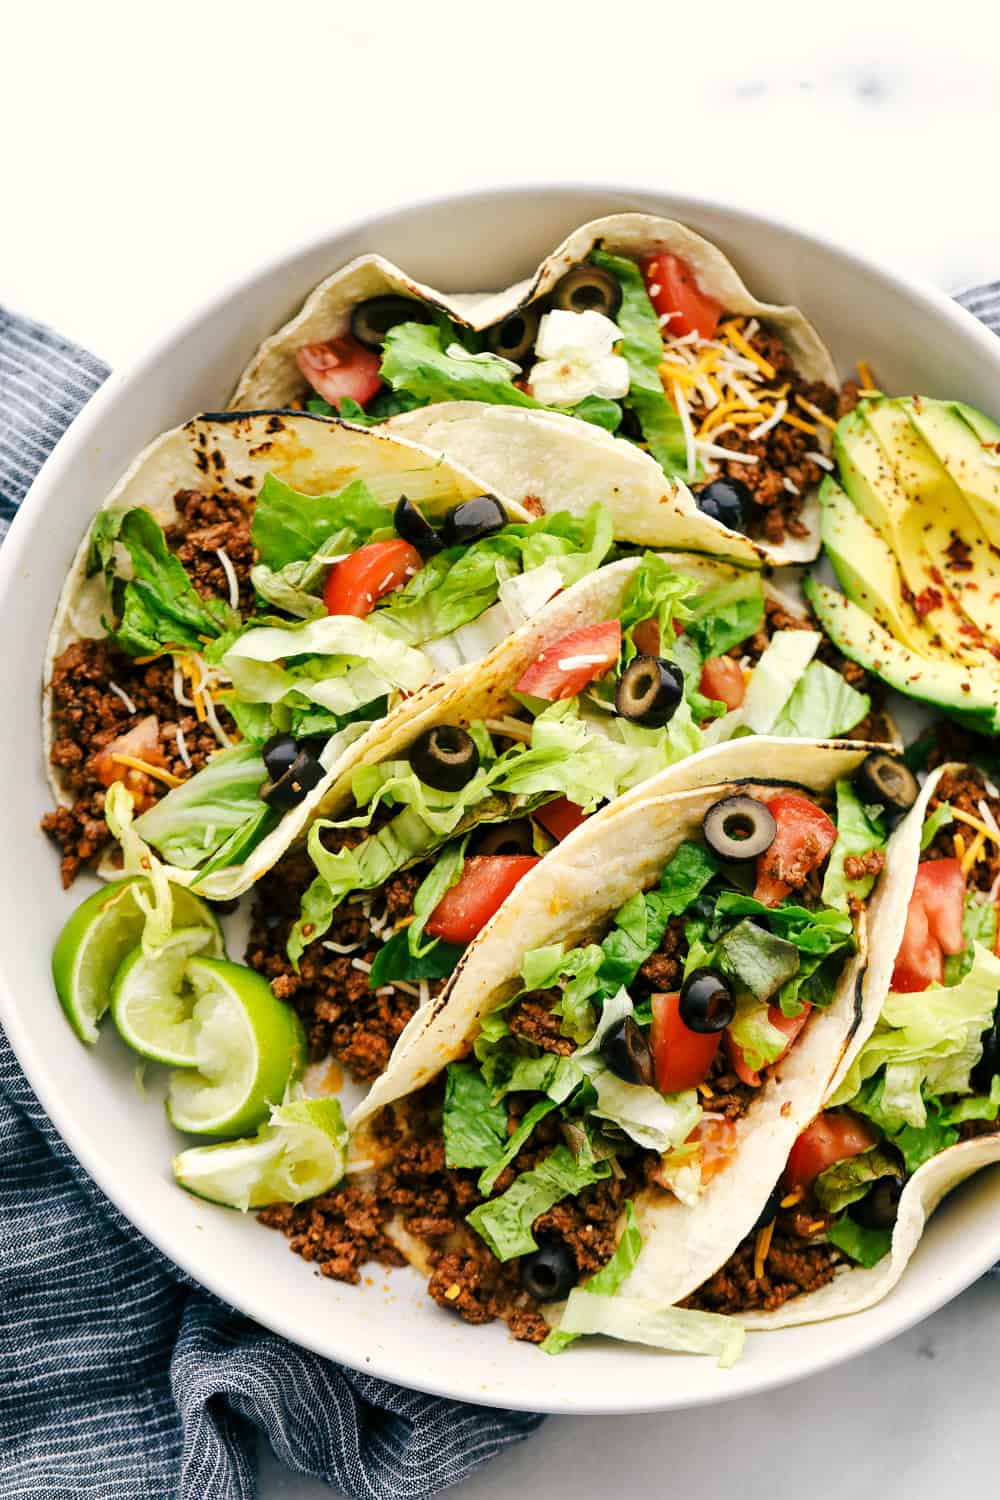
A plate of soft tacos grilled with meat and topped with shredded cheese, olives, lettuce, tomatoes and sliced avocados.

Want more taco recipes?! Try these ones!

Who doesn’t love a good taco? I’ve gathered up a few of my favorites for you to try with this seasoning!


Pin this now to find it later

Pin It

  • Combine all of the seasonings in a bowl and stir to combine.

  • Store in an airtight container for up to 6 months.

  • This recipe can easily be doubled! To use the seasoning, cook 1 pound of ground beef in a skillet until no longer pink. Add 2 tablespoons of taco seasoning to the ground beef along with 1/2 cup of water.

Originally Posted on August 27, 2019 
Updated on March 12, 2023 

Calories: 12kcalCarbohydrates: 2gProtein: 1gFat: 1gSaturated Fat: 1gPolyunsaturated Fat: 1gMonounsaturated Fat: 1gSodium: 616mgPotassium: 70mgFiber: 1gSugar: 1gVitamin A: 731IUVitamin C: 1mgCalcium: 19mgIron: 1mg

Nutrition information is automatically calculated, so should only be used as an approximation.


Source link

Powering better health care through data analytics

0


This involves using techniques, tools, and systems that help:

  • Gather and compile data points from an array of sources
  • Identify and clarify data patterns, trends, changes, and opportunities
  • Determine the correct action to achieve the best possible health outcomes

Actionable Insights and Customized Solutions

Our data, compiled from claims and internal reporting as well as vendor dashboards, enables us to have a complete and real‑time picture of our members’ health stories. This provides us with valuable insights that allow us to target unique, customized solutions for each member at each stage of their health care journey. For example, we can help answer questions like:

  • Since preventive health screenings can catch problems before they become more serious (and expensive), could members benefit from receiving screening reminders?
  • Are there any gaps in the care that members are receiving, such as annual A1C tests, biannual retinal exams, and kidney function testing for those diagnosed with diabetes?
  • Can members shift some of their health consultations from more costly settings (such as the emergency room) to less costly settings, such as urgent care centers, retail health clinics, and even telemedicine visits?

With insights from reports, dashboards, trends, benchmarks, and descriptive analysis, we can use what we’ve learned from the past to plan for future outcomes. We can also use techniques like predictive modeling, which can highlight relationships between events and issues and can help anticipate future occurrences.


Source link

How Exercise Can Help Ease Osteoarthritis Joint Pain


March 12, 2024 — It hurt to walk. So Dianne Rosenbluth saw a surgeon that friends recommended at the Duke University School of Medicine, had an X-ray, and found out she has osteoarthritis. 

Rosenbluth’s pain went away after a hip replacement, but she struggled to get her stamina back. She knew she had to “keep going and keep moving” to get better, including after a second hip replacement about 10 years ago. When the Duke Health & Fitness Center opened in nearby Durham, NC, the real estate agent, entrepreneur, and former teacher signed up. 

Rosenbluth, now 81, gets regular steroid injections in her knees to treat her joint pain and is scheduled for knee surgery this summer. “As long as I can take care of things with good medical advice, that is a privilege,” Rosenbluth said. 

Exercise has helped ease her osteoarthritis pain and improve her mobility. “It’s about setting goals for myself.” To keep up her routine, Rosenbluth sets out exercise clothes the night before. “That way if I see the clothes and I don’t exercise, I feel guilty all day.”

It may sound counterintuitive at first – suggesting that people with joint pain exercise and move more in general. But experts agree with Rosenbluth that physical activity can lessen the symptoms of osteoarthritis. 

“Someone with joint pain is often concerned that exercising will exacerbate their pain and they are hesitant to start engaging in any physical activity,” said Leigh F. Callahan, PhD, associate director of the Thurston Arthritis Research Center at the University of North Carolina, Chapel Hill.

There is a lot of evidence from medical studies that a “measured approach” to exercise can help, noted Callahan, who is also director of the Osteoarthritis Action Alliance. For example, people who are inactive should start with a low-intensity activity like walking and slowly increase their distance over time. 

The potential benefits go beyond improving joint pain. There are multiple well-conducted trials that show physical activity and exercise improve a range of arthritis and joint-related symptoms, including pain, stiffness, swelling, and the ability to perform activities of daily living, Callahan said. “In addition to the improvement in arthritis symptoms, exercise and physical activity provide mental health benefits and improve overall quality of life.”

“It can seem surprising, but gentle exercise is actually a great way to manage osteoarthritis pain,” said Nick Turkas, senior director of patient education at the Arthritis Foundation. Regular movement keeps joints flexible, preventing stiffness and increasing a person’s range of motion, he said. 

The 2-Hour Rule

Like anyone beginning a new exercise routine, check with your doctor first and start slowly, Callahan recommended.

“No pain, no gain” does not apply to exercise for people with osteoarthritis. Exercise should be challenging but not cause sharp pain, Turkas said. “We have a 2-hour pain rule. If your pain is worse 2 hours after exercise, dial it back next time.”

People may feel some pain or discomfort if they were inactive before starting to exercise, Callahan said. “However, sharp pain, pain in a new area, and pain that lasts more than 2 hours after exercising are “some of the signs they might be overdoing [it] or something is wrong.”

Common Misconceptions

Turkas dispelled some common myths people have around osteoarthritis and exercise. For example, people with joint pain might hesitate to increase their physical activity level because they worry exercise will just make their pain worse. “This is a concern,” he said, “but gentle exercise is actually proven to reduce pain and stiffness in the long run.”

Another mistaken belief is people cannot exercise because they are too stiff. Turkas recommended that people focus on their range of motion and start with small movements that they increase over time. 

And no, exercise will not “wear out” a joint, he noted. Our joints aren’t machines. Movement builds joint strength — stronger muscles, tendons, and ligaments, support proper joint alignment for efficient movement and stability.”

Fluid and Flexibility

One of the key factors in greater flexibility is synovial fluid, a thick liquid within the knees, hips, and other joints that keeps them lubricated. Healthy joint cartilage acts like a sponge, Turkas said, absorbing synovial fluid for smooth movement.

In addition to creating more synovial fluid around the joints, exercise can increase circulation of nutrients to joints, reduce inflammation, and increase blood flow to joints. Exercise also “promotes weight loss, which is helpful for joint pain and improves balance and coordination,” Callahan said. 

Physical activity can also strengthen the muscles around the joints. Strong muscles around the joint act like natural braces, taking pressure off the joint itself, Turkas said. “Exercise strengthens these muscles — improving stability and potentially reducing pain.”

When to Seek Specialty Care

Knowing when to manage osteoarthritis joint pain at home and when to seek specialty care is essential. “If you’re experiencing joint pain for more than 2 weeks, it’s important to consult a doctor to discuss the best course of action,” Turkas said. Specialists can confirm if arthritis is causing your symptoms, and they can help diagnose the specific form you have. There are more than 100 forms of arthritis, and a proper diagnosis is the key to the best treatment, he said. 

Callahan recommended arthritis-appropriate evidence-based interventions (AAEBIs) for people who want to learn more about exercise. There are 14 AAEBI exercise programs. The Arthritis Foundation offers a “Walk with Ease” program that leads people through appropriate steps for setting goals, warming up, walking, cooling down, and stretching properly. 

The Osteoarthritis Action Alliance and the CDC recognize these AAEBIs because they increase physical activity and improve arthritis symptoms. Many are offered virtually as well as in-person in community settings.

Still wondering how to get started? The Osteoarthritis Action Alliance also offers guidance on how people with joint pain can think about starting physical activity. 

As for Rosenbluth, “I need to keep going,” she said. “If I keep moving and build my stamina, I can do more.”


Source link

New Mexico Man Succumbs to Bubonic Plague, Cause Not Reported


This digitally colorized scanning electron microscopic (SEM) image depicts a number of yellow-colored, Yersinia pestis bacteria, that had gathered on the proventricular spines of a Xenopsylla cheopis flea. These spines line the interior of the proventriculus, a part of the flea’s digestive system. The Y pestis bacterium is the pathogen that causes bubonic plague.

Image Credit: National Institute of Allergy and Infectious Diseases

The New Mexico Department of Health (NMDOH) announced last Friday that a state resident died from the bubonic plague. The man was from Lincoln County, which is in the lower central portion of the state, and was hospitalized prior to his death.1

“This tragic incident serves as a clear reminder of the threat posed by this ancient disease and emphasizes the need for heightened community awareness and proactive measures to prevent its spread,” State Public Health Veterinarian Erin Phipps, DVM, MPH, said in a statement. 1

The plague is a bacterial disease carried by rodents and is generally spread to humans through the bites of infected fleas. It can also spread by direct contact with infected animals, including rodents, wildlife, and pets.1 In addition, dogs and cats that are allowed to roam and hunt can bring infected fleas from dead rodents back into the home, putting household members at risk.1

In fact, a person contracted plague through cat-to-human transmission last month in Oregon. Health officials from that state announced that the resident and the cat received treatment but the animal did not survive the illness. The patient and close contacts received medication, with health officials stating no broader community risk.2

Disease Prevention, Diagnosis, Treatment

The NMDOH offered some preventative measures to avoid contracting bubonic plague including:

  • Avoid sick or dead rodents and rabbits, and their nests and burrows
  • Prevent pets from roaming and hunting
  • Talk to a veterinarian about using an appropriate flea control product for pets as not all products are safe for cats, dogs or children.
  • Have sick pets examined promptly by a veterinarian
  • See a physician about any unexplained illness involving a sudden and severe fever
  • Clean up areas near the home where rodents could live, such as woodpiles, brush piles, junk and abandoned vehicles
  • Put hay, wood, and compost piles as far as possible from the home
  • Don’t leave pet’s food and water where rodents and wildlife can get to it

In terms of signs, CDC reports that the most common symptom is the “rapid development of a swollen and painful lymph gland called a bubo. A known flea bite or the presence of a bubo may help a doctor to consider plague as a cause of the illness,” the federal agency reports.

People who live or traveled to the western US or any places where the plague is endemic and are experiencing symptoms of the plague should seek medical care immediately, CDC writes on its site. The plague is diagnosed with a test and can be treated with antibiotics.

For the New Mexico man, it has not been reported why he contracted the plague, but according to CDC, between 1970 and 2020, there has been more reported cases (253) in that state than any other in the US.1,3 The last human plague case in New Mexico was in a Torrance County resident in 2021. In 2020, there were 4 human plague cases: 1 in Santa Fe County, 2 in Torrance County and 1 fatal case in Rio Arriba County.

The New Mexico Department of Health is conducting outreach to Lincoln County area residents and an environmental assessment will be conducted in the community to look for ongoing risk with this latest case.1

References

1. Department of Health reports death of man from plague. NMDOH press release. March 8, 2024. Accessed March 12, 2024.
https://www.nmhealth.org/news/information/2024/3/?view=2071

2. Abene S. Rare Case of the Bubonic Plague Identified in Oregon. ContagionLive. February 14, 2024. Accessed March 12, 2024.
https://www.contagionlive.com/view/rare-case-of-the-bubonic-plague-identified-in-oregon

3. Plague. CDC. Last reviewed November 26, 2019. Accessed March 12, 2024.
https://www.cdc.gov/plague/diagnosis/index.html


Source link

Guinness Chocolate Cake Recipe | The Recipe Critic

0


This website may contain affiliate links and advertising so that we can provide recipes to you. Read my disclosure policy.

Celebrate St. Patrick’s Day (or any day) with this delicious Guinness Chocolate Cake! It has the most wonderful fudgy flavor and tender texture that is complemented by a Bailey’s buttercream filling and a rich ganache frosting.

This dessert is a MUST try. If you’re a chocolate lover, like me, you will go crazy for every bite of this incredible sweet treat! If you want to try more unique chocolate desserts, we have so many good ones. Try this nostalgic ho ho cake, this fun whoopie pie cake, or this almost sinful tuxedo cake.

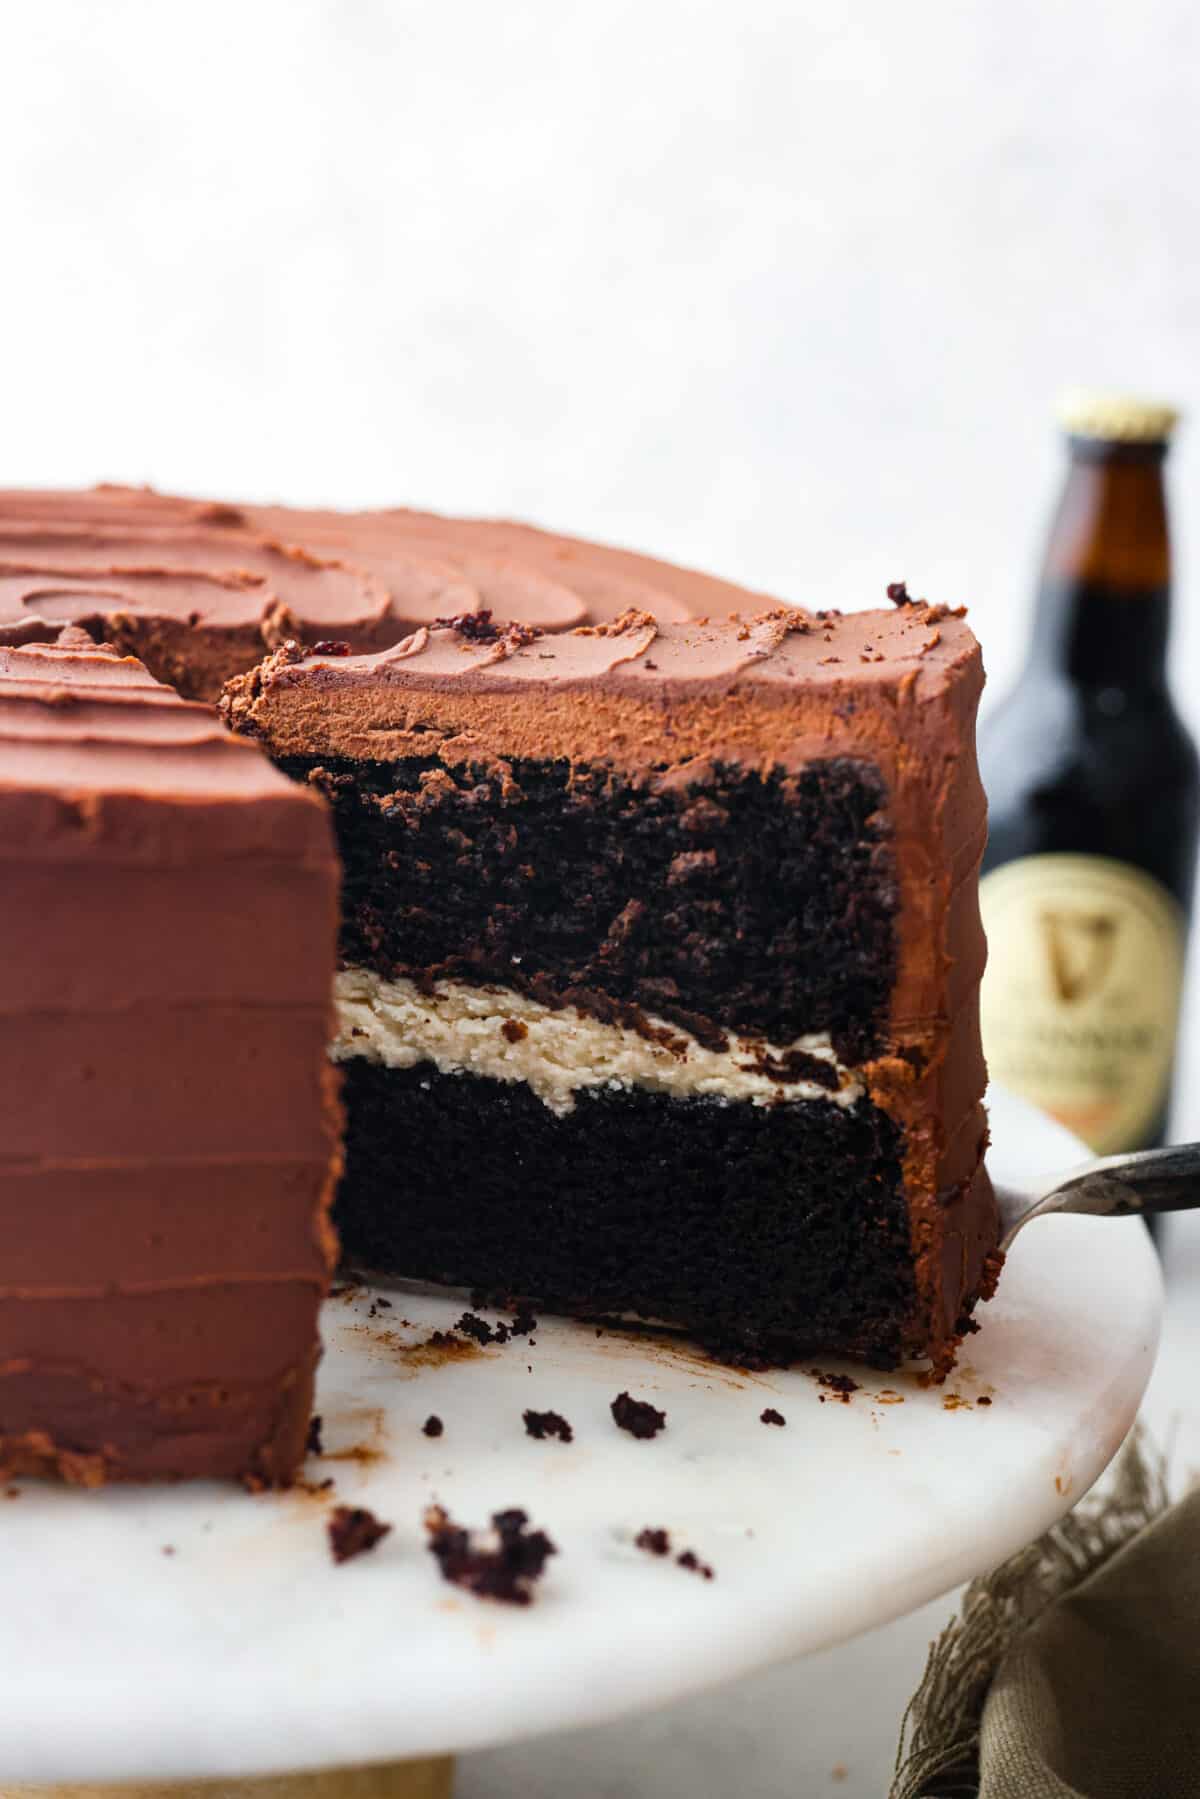
Serving a slice of Guinness chocolate cake.

Guinness Chocolate Cake Recipe

This Guinness Chocolate Cake is decadent and sweet with the perfect boozy kick. If you’re looking for a dessert to celebrate St. Patrick’s Day, this is it! The recipe features Guinness beer in the cake and the ganache frosting, and Irish cream in the buttercream filling. This is one of those recipes that’s absolutely heavenly, and one that you’ll be thinking about long after you’ve taken the last bite.

The Guinness gives the cake a fluffy texture and adds a slight malt flavor that pairs well with the chocolate without being overpowering. The buttercream spiked Bailey’s Irish cream tastes incredible and the creamy spiked ganache is the perfect finishing touch. If you’re making a full St. Patrick’s Day spread, be sure to check out our collection of all of the best St. Paddy’s Day recipes!

Ingredients Needed

The ingredient list for this Guinness cake recipe might look a bit long, but the ingredients are simple and mostly pantry staples. Plus, one bite of this flavorful, fluffy cake and you’ll see that it is so worth it! Exact measurements can be found at the end of the post in the recipe card!

Cake

  • Guinness Stout: Guinness extra stout or draught may be used. You can also use any favorite stout beer!
  • Sugar: Granulated sugar will perfectly sweeten the cake without overwhelming the flavor.
  • Cocoa Powder: Use regular unsweetened cocoa powder, not dutch process, to add depth and richness.
  • Vegetable Oil: For an extra moist crumb.
  • Eggs: Two large eggs will help bind all of the ingredients together. It’s best if they are room temperature for easy mixing.
  • Sour Cream: Use full-fat sour cream for the most wonderful moist texture.
  • Vanilla Extract: Adds warm subtle sweetness.
  • Flour: All-purpose flour will give the cake structure while keeping it nice and soft.
  • Baking Soda: Helps the layers rise properly while baking.
  • Salt: To balance the sweetness and bring out all of the delicious flavor.

Ganache

  • Chocolate: Use a high-quality semi-sweet chocolate like Ghirardelli or Guittard.
  • Heavy Cream: Makes it super creamy and irresistibly rich.
  • Guinness: For extra Irish flavor in the frosting.

Bailey’s Buttercream Filling

  • Salted Butter: Use softened butter as the foundation for the buttercream filling.
  • Powdered Sugar: Makes the buttercream sweet and smooth.
  • Bailey’s Irish Cream: Complements the Guinness cake with rich chocolate and vanilla flavors. 

How to Make a Guinness Chocolate Cake

Grab all of the ingredients and get ready to make one of the best cakes ever! This is such a special dessert and will be the hit of any party. Here’s how it all comes together:

Cake

  1. Prep: Preheat oven to 350 degrees Fahrenheit and spray two 8-inch round cake pans with pan spray and a parchment round, if desired.
  2. Heat Guinness: In a small saucepan, heat the Guinness, sugar, and cocoa powder together over medium heat until all the sugar is dissolved, about 3 minutes. Remove from the heat and let it cool for 5-10 minutes.
  3. Mix Wet Ingredients: In a separate bowl, whisk together the oil, eggs, sour cream, and vanilla. Once smooth whisk in the oil until fully combined.
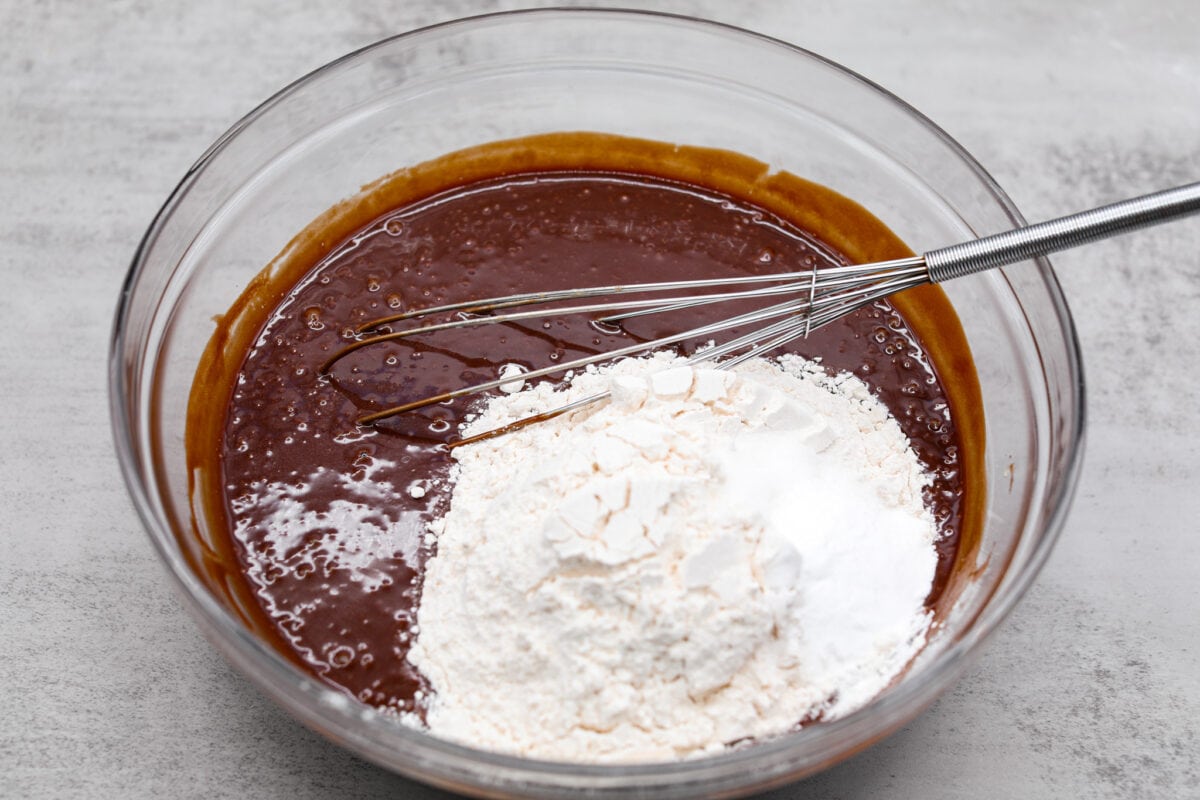
  4. Combine: Whisk the egg mixture into the sugar mixture until combined. Gently whisk in the flour, baking soda, and salt.
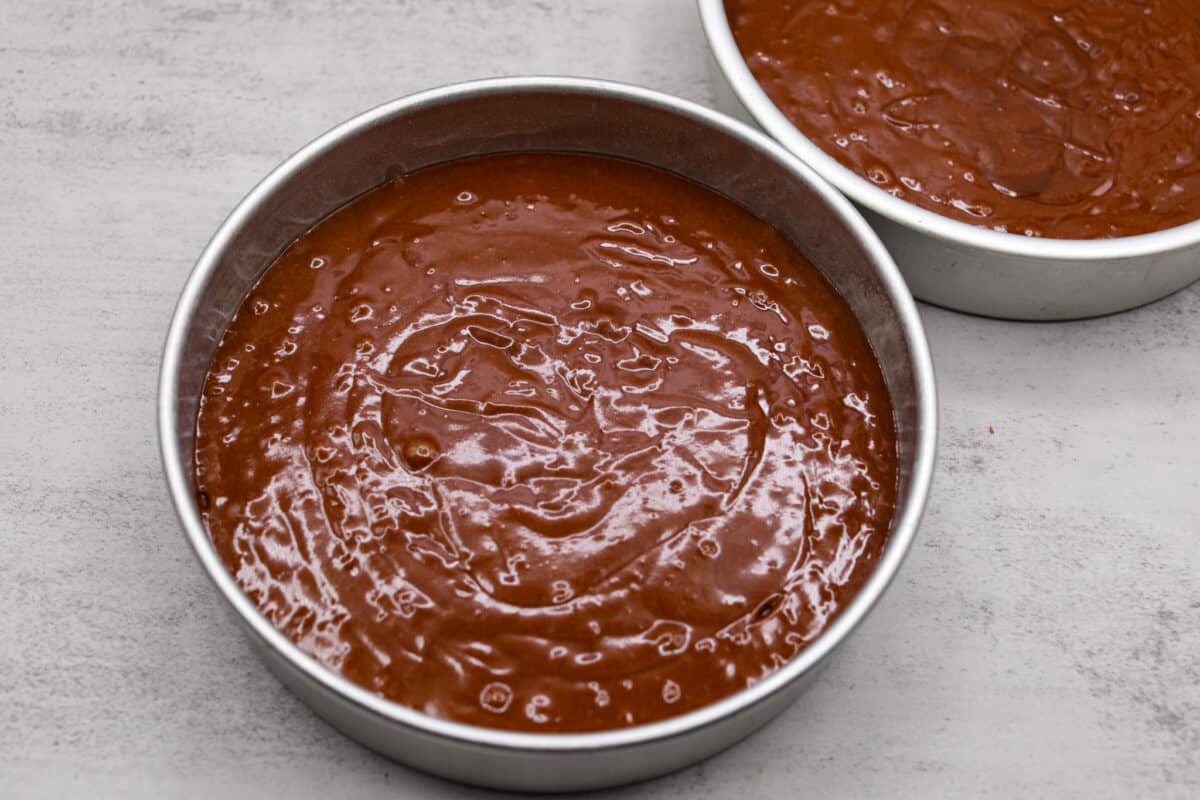
  5. Bake: Divide the batter evenly into the two prepared cake pans and bake for 40-45 minutes, until the center of the cakes spring back when lightly pressed on or a toothpick comes out clean.
  6. Cool: Let the cakes cool completely before wrapping them with plastic wrap and chilling them in the refrigerator for at least 2 hours before assembling the cake. Cold cake is significantly easier to frost than warm or room-temperature cake.

Ganache

  1. Simmer the Guinness: While the cake bakes, prepare the ganache by simmering the Guinness over low heat until reduced by half to ¼ cup. Add the cream to the pan and simmer until steaming.
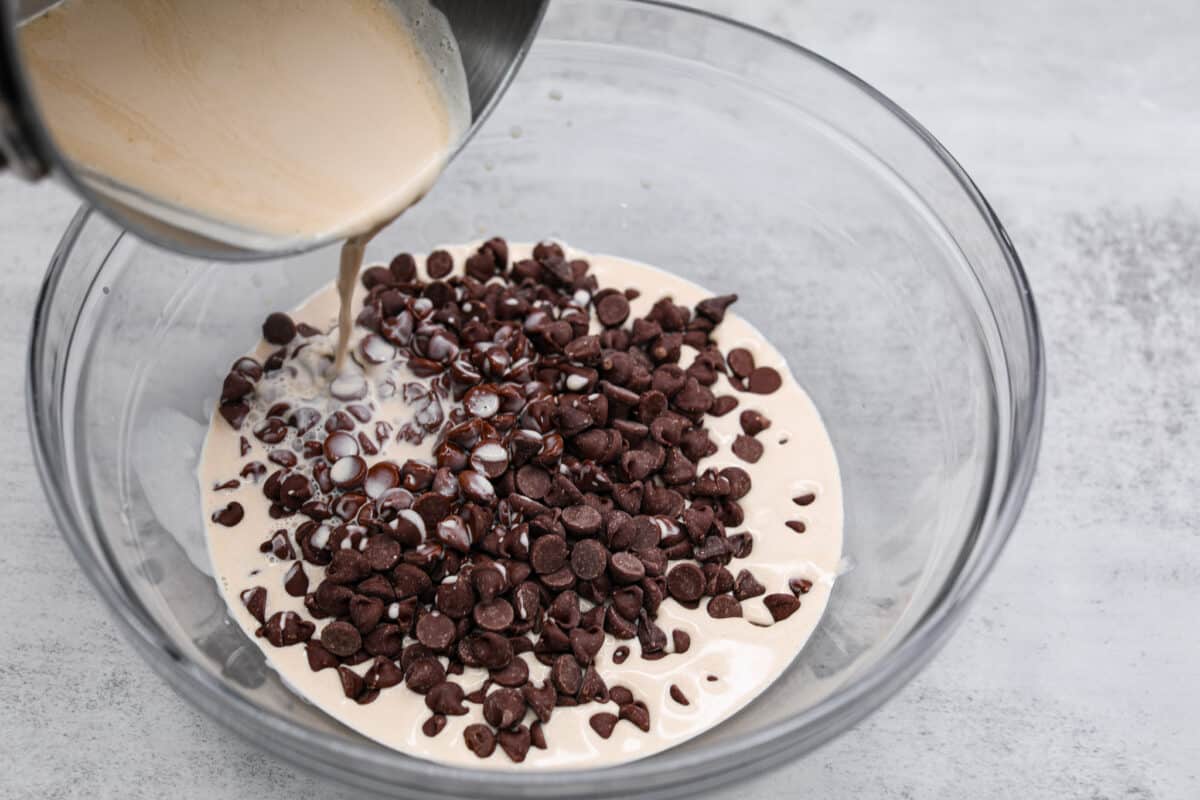
  2. Combine with Chocolate: Add the chocolate to a large bowl and pour the steaming liquid over it. Let the chocolate sit for 2 minutes before whisking until smooth and shiny. Cover the bowl and place it in the refrigerator to chill until the cakes are cooled and ready to be frosted.

Bailey’s Buttercream Filling

  1. Mix: Use a hand mixer to beat the butter, powdered sugar, and Bailey’s together in a medium bowl until combined. Start with 3 tablespoons of Bailey’s and add a little more at a time until the buttercream is soft and fluffy, but not runny.

Assembly

  1. Add Buttercream: Once the cakes are chilled and ready to be frosted, place one layer bottom side down on a cake plate or serving plate. Top with the buttercream and spread it evenly over the cake, leaving ¼-½ inch space around the perimeter of the cake so the buttercream doesn’t interfere with the ganache. Place the second layer of cake topside down on the buttercream.
  2. Whip Ganache: Whip the chilled ganache with a hand mixer until soft and fluffy. Use it immediately to frost the cake, as it will set up and harden the longer it sits. If it becomes stiff as you are frosting, use the hand mixer to beat it again until it is soft.
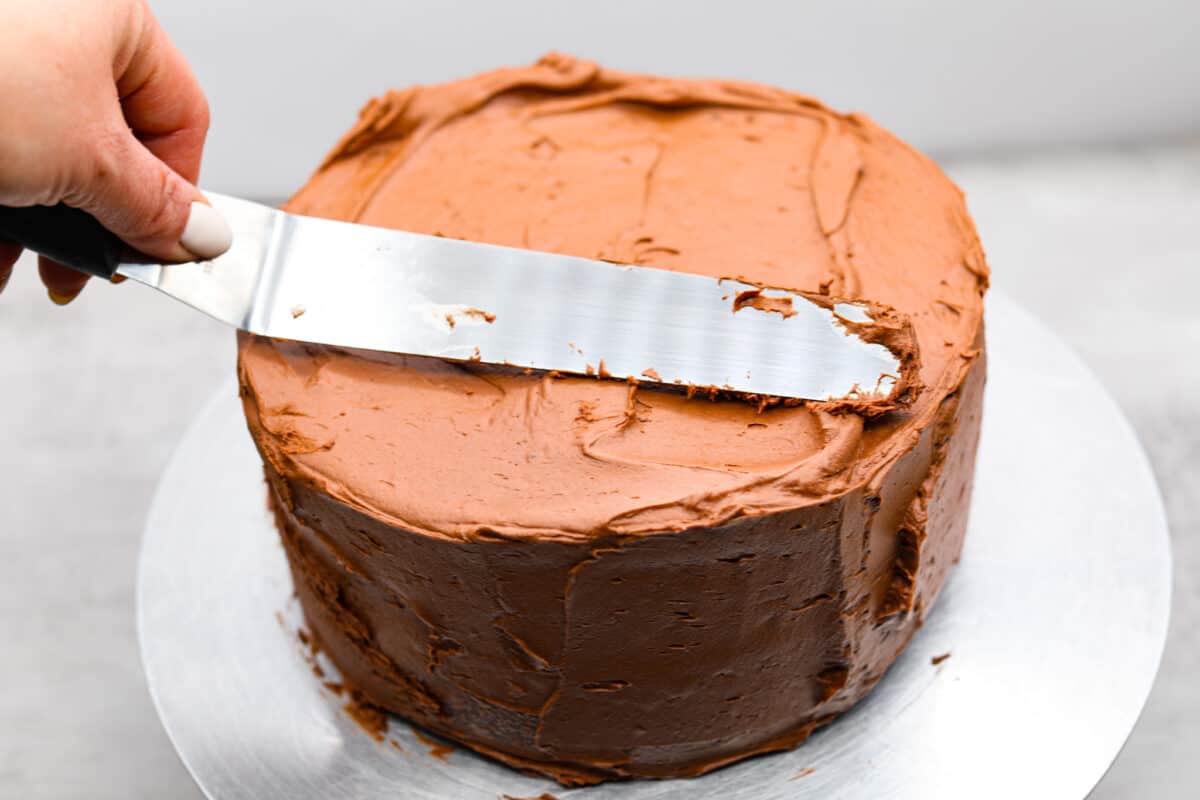
  3. Spread Ganache: Add a couple of large dollops of ganache to the top of the cake and use an offset spatula to spread it around, letting it go over the edges. Use the spatula to push the overhanging ganache down onto the sides, adding more from the bowl as needed. Try not to lift the spatula straight up off the cake, as that can cause the ganache to pull off from the cake bringing crumbs with it. Instead, move the spatula in a swiping motion to stop contact with the ganache.
  4. Smooth Ganache: Once the cake has been covered in an even layer of ganache, you may use the offset spatula or a bench scraper with a straight edge to smooth it. I like to run my metal tools under very hot water and dry them thoroughly before using the hot metal to smooth the ganache.

Use a 9×13 Pan

You may also bake this cake in a 9×13-inch pan. Spray the pan well with pan spray with flour in it or use regular pan spray and dust the pan with flour and tap out the excess. Bake for 35-40 minutes.

Tips and Variations

Use these helpful tips and options to make an amazing chocolate Guinness cake!

  • Beer Options: If you are not going to use Guinness beer, it may be substituted for any other stout beer. If you would like to leave out the beer completely, I recommend using this recipe for chocolate cake instead.
  • Use Butter: You may substitute the oil for butter if you would like to. Add the butter to the saucepan with the beer, sugar, and cocoa powder. Cook it until the sugar is fully dissolved and the butter is completely melted. If you use salted butter, reduce the salt in the recipe to ½ teaspoon.
  • What if the Cakes Sink? Don’t be alarmed if your cakes sink a little! The best way to avoid this is to let the cakes bake undisturbed as long as possible since opening the oven door causes a drop in temperature and that can make the cakes fall. These cakes bake longer than a standard cake, so try to wait until 40 minutes. If the cakes do sink a little, let them cool completely before using a serrated knife to carefully level off the cake. If it is just a slight dip in the center, invert the warm cake upside down on the cooling rack right out of the oven. Letting it cool upside down will often help level out the dip.
  • Frosting Option: You may omit the Bailey’s buttercream filling and just use ganache instead.
  • Irish Cream Option: If you don’t have Bailey’s you may use an equal amount of Irish Cream flavored syrup or 1 tablespoon of vanilla extract instead.

Serving a slice of cake.

Storing Leftovers

  • Room Temperature: Store leftover cake at room temperature for up to 3 days in an airtight container.
  • In the Refrigerator: To keep fresh for up to 5 days, place in an airtight container in the fridge.
  • To Freeze: The unfrosted cake rounds may be baked and frozen for up to 3 months. Let the cakes cool to room temperature before wrapping each layer tightly in 2-3 layers of plastic wrap. They may be used directly from the freezer, or thawed in the refrigerator. I recommend frosting them while either frozen or chilled.

A slice of chocolate Guinness cake on a scalloped plate.

More Chocolate Cake Recipes

If you love chocolate and cake, you’re in the right place! We have so many tried and true chocolate cake favorites that you’re definitely going to want to try! No matter the occasion, these are always a hit!

Pin this now to find it later

Pin It

Bailey’s Buttercream Filling

Cake

  • Preheat oven to 350 degrees Fahrenheit and spray 2 8-inch round cake pans with pan spray and a parchment round, if desired.

  • In a small saucepan, heat the Guinness, sugar, and cocoa powder together over medium heat until all the sugar is dissolved, about 3 minutes. Remove from the heat and let it cool for 5-10 minutes.

  • In a separate bowl, whisk together the oil, eggs, sour cream, and vanilla. Once smooth whisk in the oil until fully combined.

  • Whisk the egg mixture into the sugar mixture until combined. Gently whisk in the flour, baking soda, and salt.

  • Divide the batter evenly into the two prepared cake pans and bake for 40-45 minutes, until the center of the cakes spring back when lightly pressed on or a toothpick comes out clean.

  • Let the cakes cool completely before wrapping them with plastic wrap and chilling them in the refrigerator for at least 2 hours before assembling the cake. Cold cake is significantly easier to frost than warm or room-temperature cake.

Ganache

  • While the cake bakes, prepare the ganache by simmering the Guinness over low heat until reduced by half to ¼ cup. Add the cream to the pan and simmer until steaming.

  • Add the chocolate to a large bowl and pour the steaming liquid over it. Let the chocolate sit for 2 minutes before whisking until smooth and shiny. Cover the bowl and place it in the refrigerator to chill until the cakes are cooled and ready to be frosted.

Bailey’s Buttercream Filling

  • Use a hand mixer to beat the butter, powdered sugar, and Bailey’s together in a medium bowl until combined. Start with 3 tablespoons of Bailey’s and add a little more at a time until the buttercream is soft and fluffy, but not runny.

Assembly

  • Once the cakes are chilled and ready to be frosted, place one layer bottom side down on a cake plate or serving plate. Top with the buttercream and spread it evenly over the cake, leaving ¼-½ inch space around the perimeter of the cake so the buttercream doesn’t interfere with the ganache. Place the second layer of cake topside down on the buttercream.

  • Whip the chilled ganache with a hand mixer until soft and fluffy. Use it immediately to frost the cake, as it will set up and harden the longer it sits. If it becomes stiff as you are frosting, use the hand mixer to beat it again until it is soft.

  • Add a couple of large dollops of ganache to the top of the cake and use an offset spatula to spread it around, letting it go over the edges. Use the spatula to push the overhanging ganache down onto the sides, adding more from the bowl as needed. Try not to lift the spatula straight up off the cake, as that can cause the ganache to pull off from the cake bringing crumbs with it. Instead, move the spatula in a swiping motion to stop contact with the ganache.

  • Once the cake has been covered in an even layer of ganache, you may use the offset spatula or a bench scraper with a straight edge to smooth it. I like to run my metal tools under very hot water and dry them thoroughly before using the hot metal to smooth the ganache.

Calories: 899kcalCarbohydrates: 98gProtein: 9gFat: 53gSaturated Fat: 24gPolyunsaturated Fat: 11gMonounsaturated Fat: 14gTrans Fat: 0.4gCholesterol: 84mgSodium: 533mgPotassium: 429mgFiber: 7gSugar: 67gVitamin A: 666IUVitamin C: 0.2mgCalcium: 69mgIron: 5mg

Nutrition information is automatically calculated, so should only be used as an approximation.

Leftovers Callout Title

Lorem ipsum dolor sit amet, consectetur adipiscing elit, sed do eiusmod tempor incididunt ut labore et dolore magna aliqua.


Source link

Shingles Vaccination Is So Worthwhile

0


There are so many vaccinations we’re supposed to make sure we receive. The flu, RSV, COVID-19, pneumococcal pneumonia…these are all important and could save your life. But there’s one vaccination I want to make sure you don’t overlook: Shingles!

This infection is rarely life-threatening, but it really hurts! In some people, the pain sticks around for a long time after the telltale rash disappears. And in a few unfortunate individuals, the pain never goes away.

I’ve had shingles three times — because I didn’t get the vaccine when I should have. I’ve now been vaccinated, and I haven’t gotten it since.

But, believe me, three times is more than enough!

What is Shingles?

Shingles, also known as herpes zoster, is a condition caused by the varicella-zoster virus — the same infection that causes chickenpox. More than 99 percent of people born in the U.S. before 1980 have had chickenpox. If you’re one of them, varicella zoster has lain dormant in the nerves of your body ever since, and it’s there to stay. Then, for reasons that aren’t well understood, it sometimes wakes up…and causes you to have shingles, a form of nerve pain.

About a third of all people in the U.S. will develop shingles at some point in their lifetimes, but it’s more commonly diagnosed in:

  • White people
  • Women
  • People who are immunosuppressed

But anyone who has had chickenpox can get it and your risk of getting shingles increases with age. About 50 percent of new shingles cases affect people who are 60 or older. So, just because you haven’t had it yet, don’t assume you’re in the clear!

What Are the Signs of Shingles?

Shingles starts with pain, burning, itching, or tingling on one side of your torso or your face. At first there may be no other symptoms. The pain can be so intense, you might even think you’re having a heart attack.

You could also experience:

  • Fever
  • Headache
  • Sensitivity to light
  • Fatigue

But then, usually within a few days, a blistery skin rash appears in that area. The blisters may break open, ooze fluid, then crust over.

People who haven’t previously been exposed to the varicella-zoster virus can catch chickenpox from you at that point. So, stay away from others who can catch it until the blisters have scabbed over. People who are susceptible are:

  • Anyone who has never had chickenpox (unless they’ve been vaccinated)
  • Babies under 12 months old
  • Those who are pregnant, or who have a serious health condition like cancer or AIDS

A small percentage of people never get the rash, which makes diagnosis harder. But if you’re ever in severe pain, see your doctor immediately anyway, no matter what the cause!

Can Shingles Be Treated?

There is no cure for the varicella-zoster virus. Once it’s in your body, it’s there to stay. However, the good news is that shingles is treatable.

Once shingles develop, it can last between three and five weeks or longer! The sooner treatment begins, the better it will work. So get yourself to your primary care practitioner at the first sign that something is wrong.

They’ll likely give you an antiviral drug to help make the rash go away sooner. They may also give you a steroid medication to reduce your risk of postherpetic neuralgia — a complication in which the pain sticks around even after the rash is gone (sometimes for months or more!).

Aside from those treatments, your doctor may recommend acetaminophen or ibuprofen for the pain, and Calamine lotion or something similar if you’re itching.

The Best News? Shingles Can Be Prevented!

Getting vaccinated against shingles is a much, much better move than treating it after it begins. The vaccine, called Shingrix, is more than 90 percent effective in preventing shingles and postherpetic neuralgia. And the CDC recommends it for anyone over the age of 50. Vaccination is also recommended to prevent herpes zoster and related complications in immunodeficient or immunosuppressed adults aged 19 or older.

You can get Shingrix in most pharmacies. And if you have a Medicare prescription drug plan (Part D), vaccination won’t cost you a thing.

But for the vaccine to work properly, you have to get it in two doses, anywhere between two and six months apart. So, set a reminder on your phone or mark your calendar — you don’t want to forget that second dose! Better still, make the appointment for the second dose while you’re getting the first one.

You may have some side effects from the vaccine. Most people get a sore arm where the shot was administered, and possibly redness and swelling. Some people also feel tired or have a headache, fever, stomach pain, or nausea. But these symptoms go away in about two to three days — which is a lot better than the weeks of misery that shingles can bring!

By the way, chickenpox is preventable now too — thanks to the chickenpox vaccine, which has cut chickenpox cases by 97 percent in the last 25 years! And obviously if someone never gets infected with the varicella-zoster virus in the first place, they’re very unlikely to get shingles later. So, encourage the parents of young children to get this and all other recommended vaccinations.

Shingles Is No Joke

I sincerely hope you never have to experience this condition. If you’re over 50 years old, please get yourself vaccinated (if you haven’t already) — even if you’ve already had shingles! I’m living proof that you can get it more than once. And spread the word about the shingles vaccine to your family and friends.

If you do develop this condition, get to your doctor’s office immediately! Timely treatment could make all the difference between suffering for weeks and suffering for months.


Source link

Ultra Moist Coconut Cake Recipe


Sometimes our family eats eggs for breakfast, and sometimes we have (healthy) cake. This coconut cake recipe is a little more decadent than our breakfast cake go-to so it’s perfect for company, birthdays, and even Easter. It has a rich, golden color and it’s absolutely packed with coconut flavor!

Coconut Cake Recipe With Swiss Meringue Buttercream

Coconut cake has become a springtime dessert staple for many families. Most of these recipes call for ingredients like powdered sugar, all-purpose flour, vegetable oil, and lots of refined sugar. Or they start off with a box mix. This recipe though uses a blend of coconut and almond flour instead of cake flour for a gluten and grain-free version. And instead of regular milk or heavy cream, we’re using coconut milk.

The cake itself is naturally dairy-free, but the frosting isn’t. If you need a completely dairy-free version then just use your favorite frosting and add coconut extract. I like using Swiss meringue buttercream here for a rich flavor and there’s some protein thanks to the egg whites. Cream cheese frosting is also delicious. Here’s a dairy-free, naturally sweetened frosting option (just use it for the top and middle of the coconut cake).

Coconut and More Coconut

Unlike all those super-white coconut cakes out there, this one has a lovely golden hue due to the coconut sugar used in both the cake and the frosting. I also use toasted coconut to decorate the outside, but you can use untoasted if preferred. Coconut extract yields an even more intense coconutty flavor in this cake.

While sweetened coconut flakes are a little more moist, I prefer to use unsweetened. They taste just as good once they’re in the cake and it doesn’t add a ton of refined sugar. Coconut shreds or flakes are long and make the cake a little awkward to eat. An easy fix is to run them through the food processor first to chop them up.

Another tip is to use room-temperature ingredients in the recipe. They mix together better than cold ones for a better crumb.

Coconut Cupcakes

If you don’t want to deal with cake layers you could also make this into cupcakes. Simply pour the batter into a lined or greased cupcake pan and bake for about 22-25 minutes. The exact time will depend on your oven and how full your cupcake wells are. Cool and frost, adding some coconut shreds to the top for decoration

Another even easier option is to make a sheet cake. Line the bottom of your sheet pan with parchment paper (or grease it) and bake just until done in the center. The exact bake time will depend on what size pan you use but should be between 15 and 25 minutes. Once it’s cooled frost it and add your coconut shreds.

This gorgeous looking cake makes an elegant dessert that I feel good about serving to my family (and guests!).

Coconut_Cake

Coconut Cake Recipe

This golden brown cake has a delicious coconut flavor. It’s made with coconut sugar, coconut milk, coconut shreds, and coconut extract!

To Make the Cake:

  • Grease two 9-inch cake pans.

  • Line the bottom of each cake pan with a circle of parchment paper and then grease that too. Set aside.

  • Preheat oven to 350°F.

  • In a medium-sized mixing bowl, stir together the almond flour, coconut flour, baking powder, and salt.

  • In a stand mixer with the paddle attachment, mix together the melted coconut oil, coconut sugar, eggs, sour cream, vanilla extract, coconut extract, and canned coconut milk on medium speed until smooth. You can also use a handheld electric mixer.

  • Stir in the dry ingredients and chopped coconut flakes.

  • Divide the cake batter evenly between the prepared pans and smooth.

  • Bake for about 30 minutes or until a toothpick inserted into the center comes out clean.

  • Remove from the oven and cool completely on a wire rack before frosting.

To Make the Frosting:

  • Follow the instructions for making Mocha Swiss Meringue Buttercream, but instead of adding instant coffee granules and melted chocolate at the end, add coconut extract.

To Assemble the Cake:

  • Place one of the round cakes, right side up, on a cake stand or serving dish.

  • Spread about 1 cup of the buttercream on top of the cake in an even layer.

  • Flip the second cake upside down on top of the first.

  • Frost the top and sides of the cake with the remaining frosting.

  • Decorate with additional coconut (plain or toasted coconut) if desired.

  • Serve and enjoy!

Nutrition Facts

Coconut Cake Recipe

Amount Per Serving (1 serving)

Calories 453
Calories from Fat 333

% Daily Value*

Fat 37g57%

Saturated Fat 26g163%

Trans Fat 0.01g

Polyunsaturated Fat 1g

Monounsaturated Fat 3g

Cholesterol 77mg26%

Sodium 96mg4%

Potassium 208mg6%

Carbohydrates 26g9%

Fiber 7g29%

Sugar 11g12%

Protein 8g16%

Vitamin A 189IU4%

Vitamin C 1mg1%

Calcium 79mg8%

Iron 2mg11%

* Percent Daily Values are based on a 2000 calorie diet.

  • I sometimes make a quick coconut cream cheese frosting for the filling of the cake and use all the buttercream on the outside.
  • Store any leftovers in an airtight container in the fridge.
  • The nutrition data does not include the frosting. 

Do you have a favorite cake recipe? Leave a comment and let us know!


Source link

Bulevirtide Demonstrates Efficacy, Safety for Hepatitis D Treatment


For patients who have chronic hepatitis Delta (HDV), which is the most severe form of viral hepatitis, the infection can often come with poor prognosis and high rates of mortality. And combined with the possible coinfections such as hepatitis B (HBV) and HIV, disease management can be extremely difficult.

“What we know is hepatitis delta prevalence in people living with HIV is actually higher than in people who do not have HIV,” Anu Osinusi, MD, vice president, Clinical Research for Hepatitis, Respiratory and Emerging Viruses, Gilead, said. “And so because of the common routes of transmissions of these diseases, HIV, hepatitis B, and hepatitis Delta, people who have triple infections, what we also know from the data is that there is a higher rate of liver-related outcomes such as developing cirrhosis, decompensated liver disease, liver cancer…larger rates of the need for liver transplantation and overall death, compared to individuals who just have hepatitis B or hepatitis D.”

With the potential severity of chronic hepatitis D and the coinfections and limited treatment options, there is an unmet need for therapies. Bulevirtide (Hepcludex, Gilead) is a first-in-class entry inhibitor that was approved in the European Union for chronic HDV infection in HDV RNA positive adult patients with compensated liver disease. The therapy is an investigational treatment in the United States.

“What bulevirtide does is it essentially binds to and then inactivates the NTCP receptor, which then has the goal of preventing new infections in the hepatocytes, and then inhibits the propagation of hepatitis Delta itself,” Osinusi said.

At last week’s Conference on Retroviruses and Opportunistic Infections (CROI) in Denver, CO, data was presented on bulevirtide in regards to those with chronic hepatitis D and also included results on 2 patients who had HIV, hepatitis B, and hepatitis D.

Study Parameters and Results
In this study, 150 participants with chronic hepatitis D were randomized (1:1:1) into 3 arms including Arm A, which was no active anti-HDV treatment for 48 weeks, followed by bulevirtide 10mg/d for 96 weeks (n=51), and Arms B or C: immediate treatment with bulevirtide at 2 mg/d (n=49) or 10 mg/d (n=50), respectively, each for 144 weeks, with follow-up of 96 weeks after end of treatment. Efficacy was measured by combined (undetectable HDV RNA or ≥2 log10 IU/mL decline from BL and ALT normalization), virologic and biochemical response rates.

“At week 96, 39% to 56% of patients responded with substantially reduced levels of HDV RNA and with normal levels of the liver enzyme alanine aminotransferase, a key marker of liver health. Through 2 years of treatment, bulevirtide was safe and well tolerated,” the study authors wrote.

Osinusi explained that for some participants it may have taken longer time to see a therapeutic benefit.

“Even in the patient participants who didn’t have a virologic response at week 24, over time, many of those participants actually go on to have this improved response at week 96,” she said.

For the 2 individual patients in the subset who had HBV/HDV, they also saw a benefit. “At week 96, both patients achieved a combined response (virologic and ALT normalization) as well as improvements in HBV DNA, platelet levels, and liver stiffness measurements,” the investigators wrote. “Neither patient required changes to their anti-HIV regimen nor did they experience serious [adverse events] AEs related to [bulevirtide] BLV.”

Contagion spoke to Osinusi who offered further insights on the study and the therapy.

Reference
Wedemeyer H, Aleman S, Brunetto M, et al. Efficacy and Safety of Bulevirtide 2 mg or 10 mg for 96 Weeks in Chronic Hepatitis Delta, Including in 2 Patients With HIV/Hepatitis B Virus/Hepatitis Delta Virus. Poster #735 presented at CROI 2024. March 3-6, 2023. Denver, CO.


Source link

Pesto Baked Chicken Thighs – Minimalist Baker Recipes

0


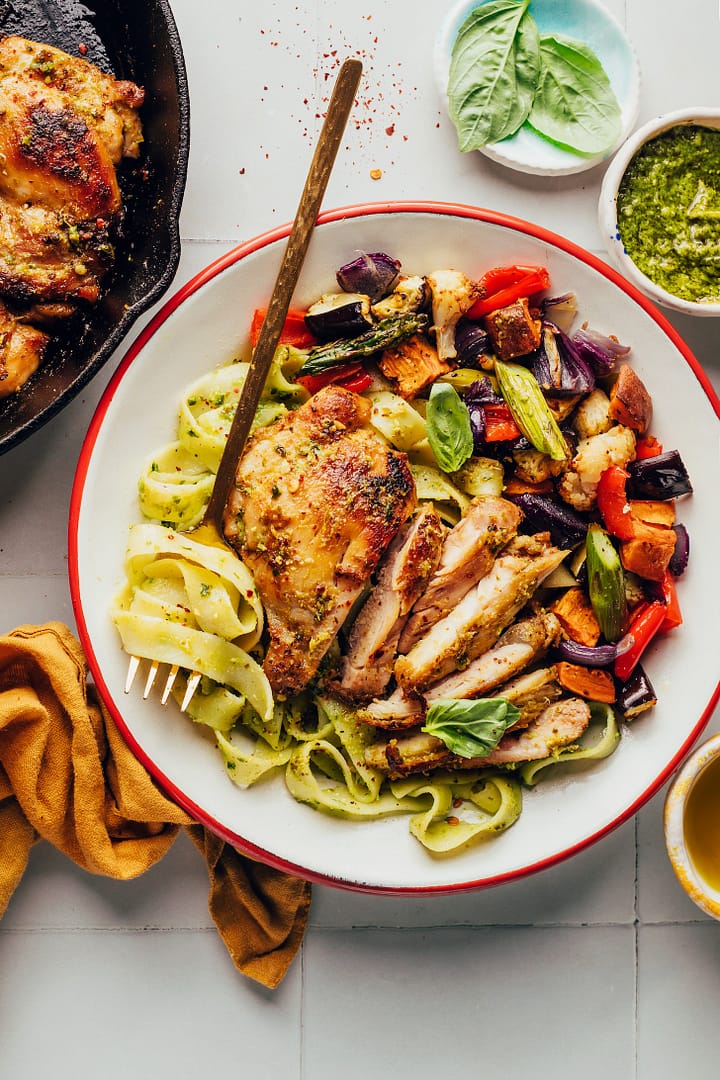
Golden brown pesto baked chicken thighs in a cast iron skillet

Sometimes we post what we’re eating on Instagram and you want the recipe right away. Waiting for good things is hard, but you’ve proved you can do hard things. The wait for our pesto baked chicken thighs is finally over, and we have a feeling the recipe will be on repeat in your kitchens!

This garlicky, herby dish comes together in just 20 minutes and pairs well with just about anything, including salads, pasta, potatoes, and roasted veggies. Let’s make it!

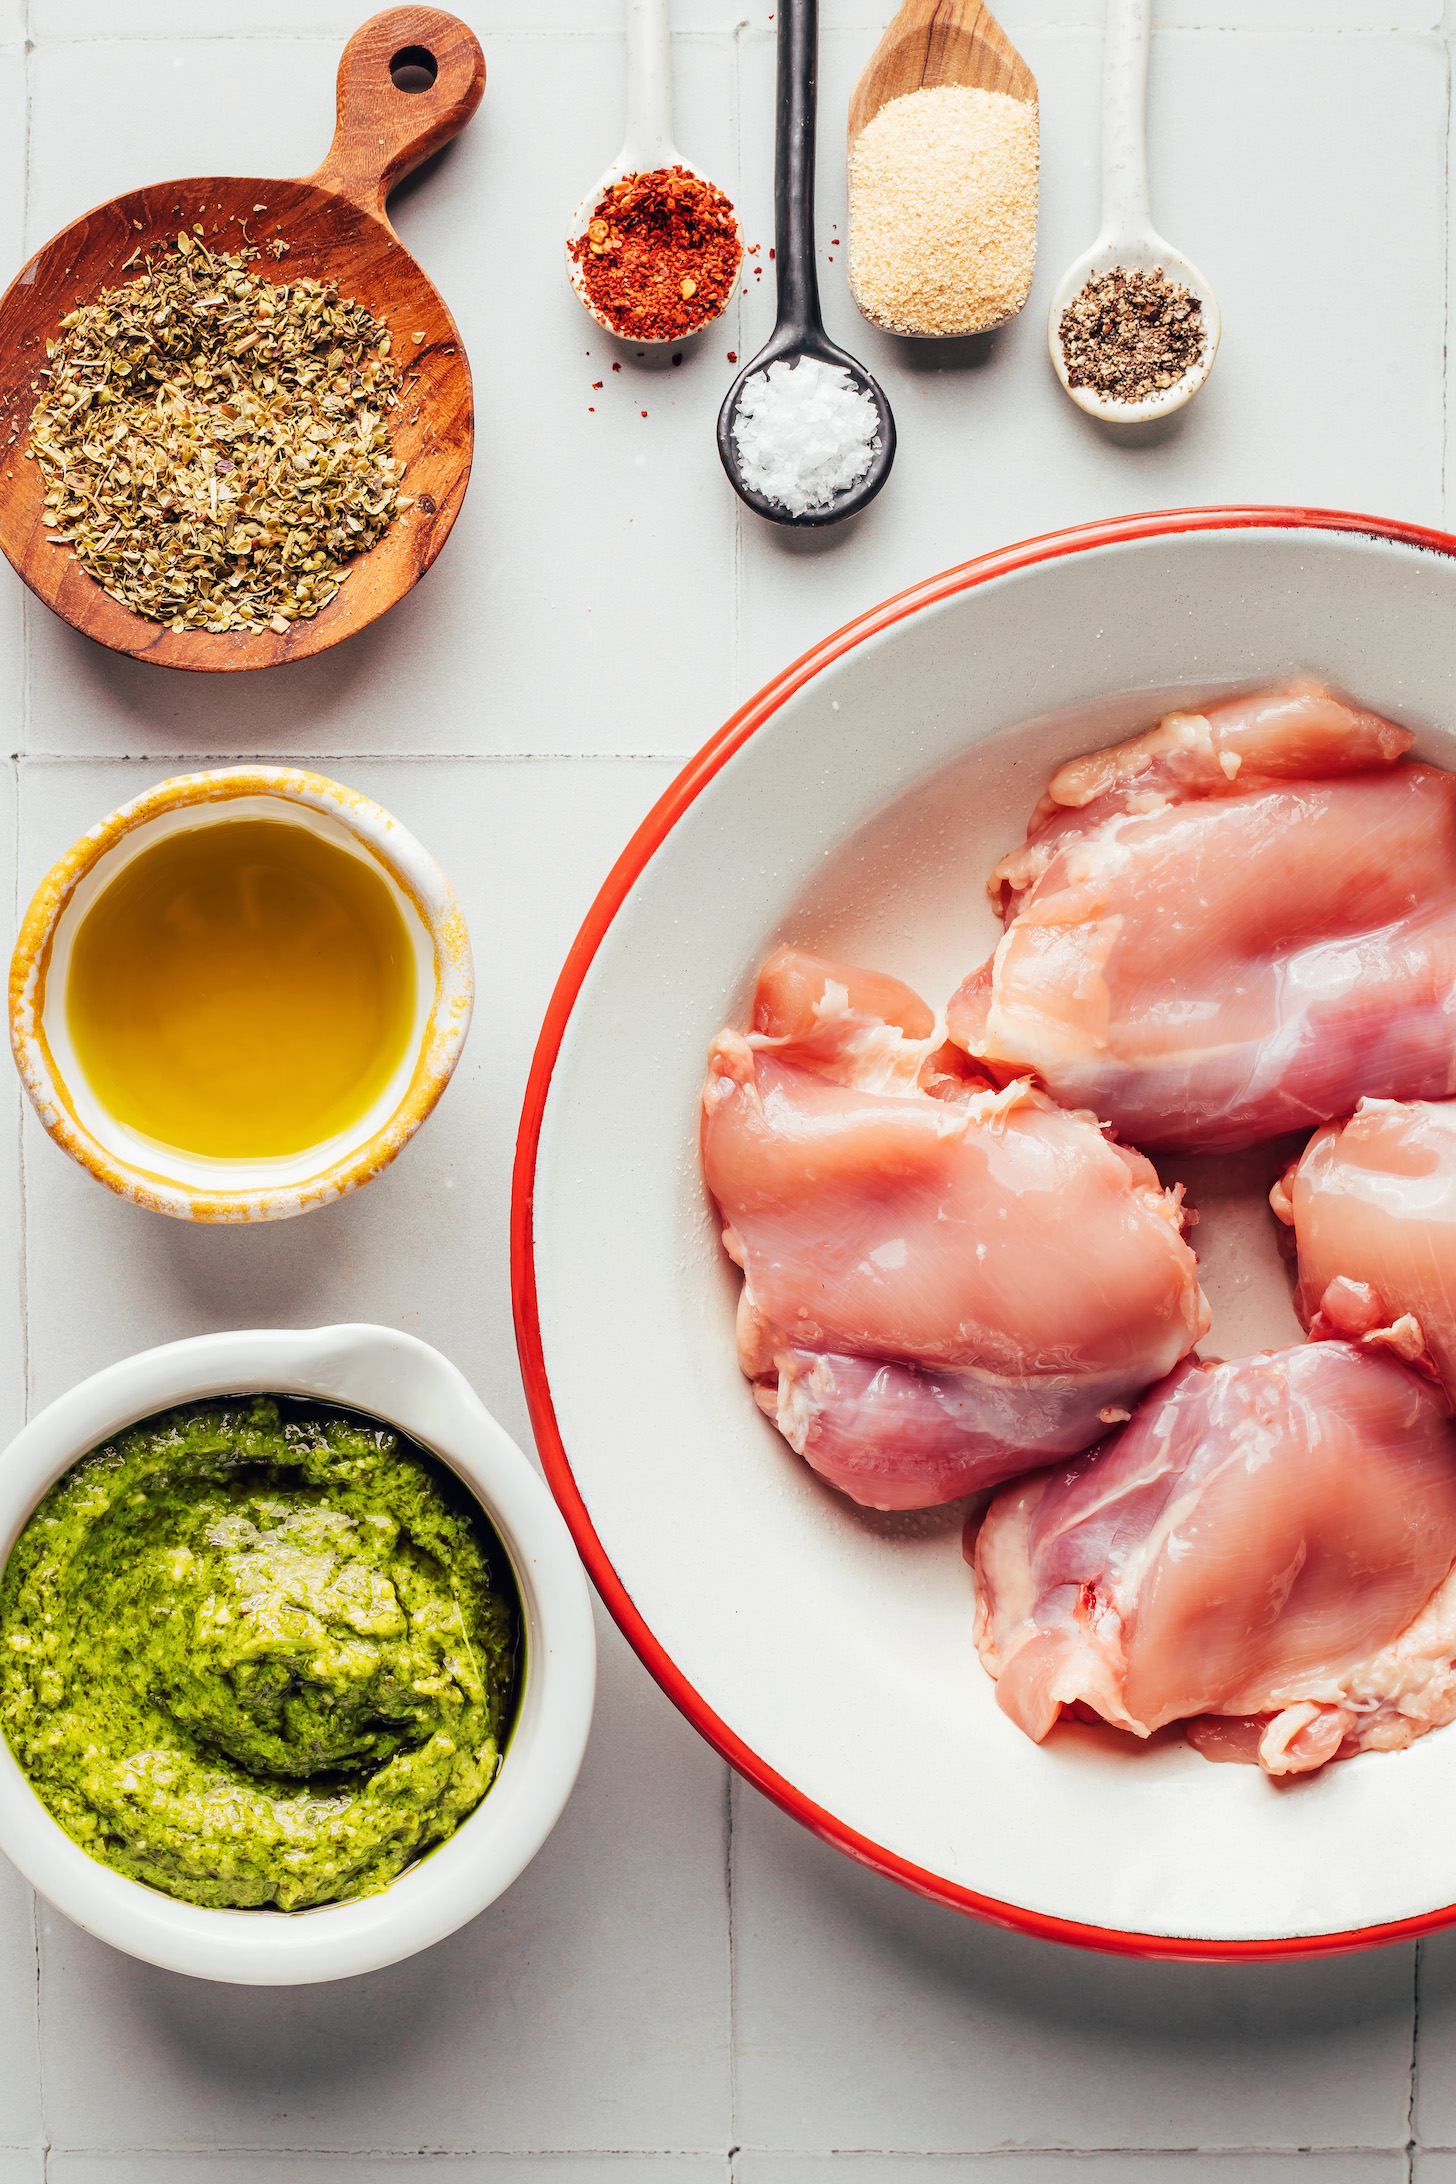
Boneless skinless chicken thighs, pesto, olive oil, dried Italian herbs, red pepper flakes, salt, garlic powder, and black pepper

These EASY pesto baked chicken thighs begin with seasoning the chicken with garlic powder, dried Italian herbs, salt, pepper, red pepper flakes, and PESTO! The mixture is savory and salty with a little herbiness and a kick of heat.

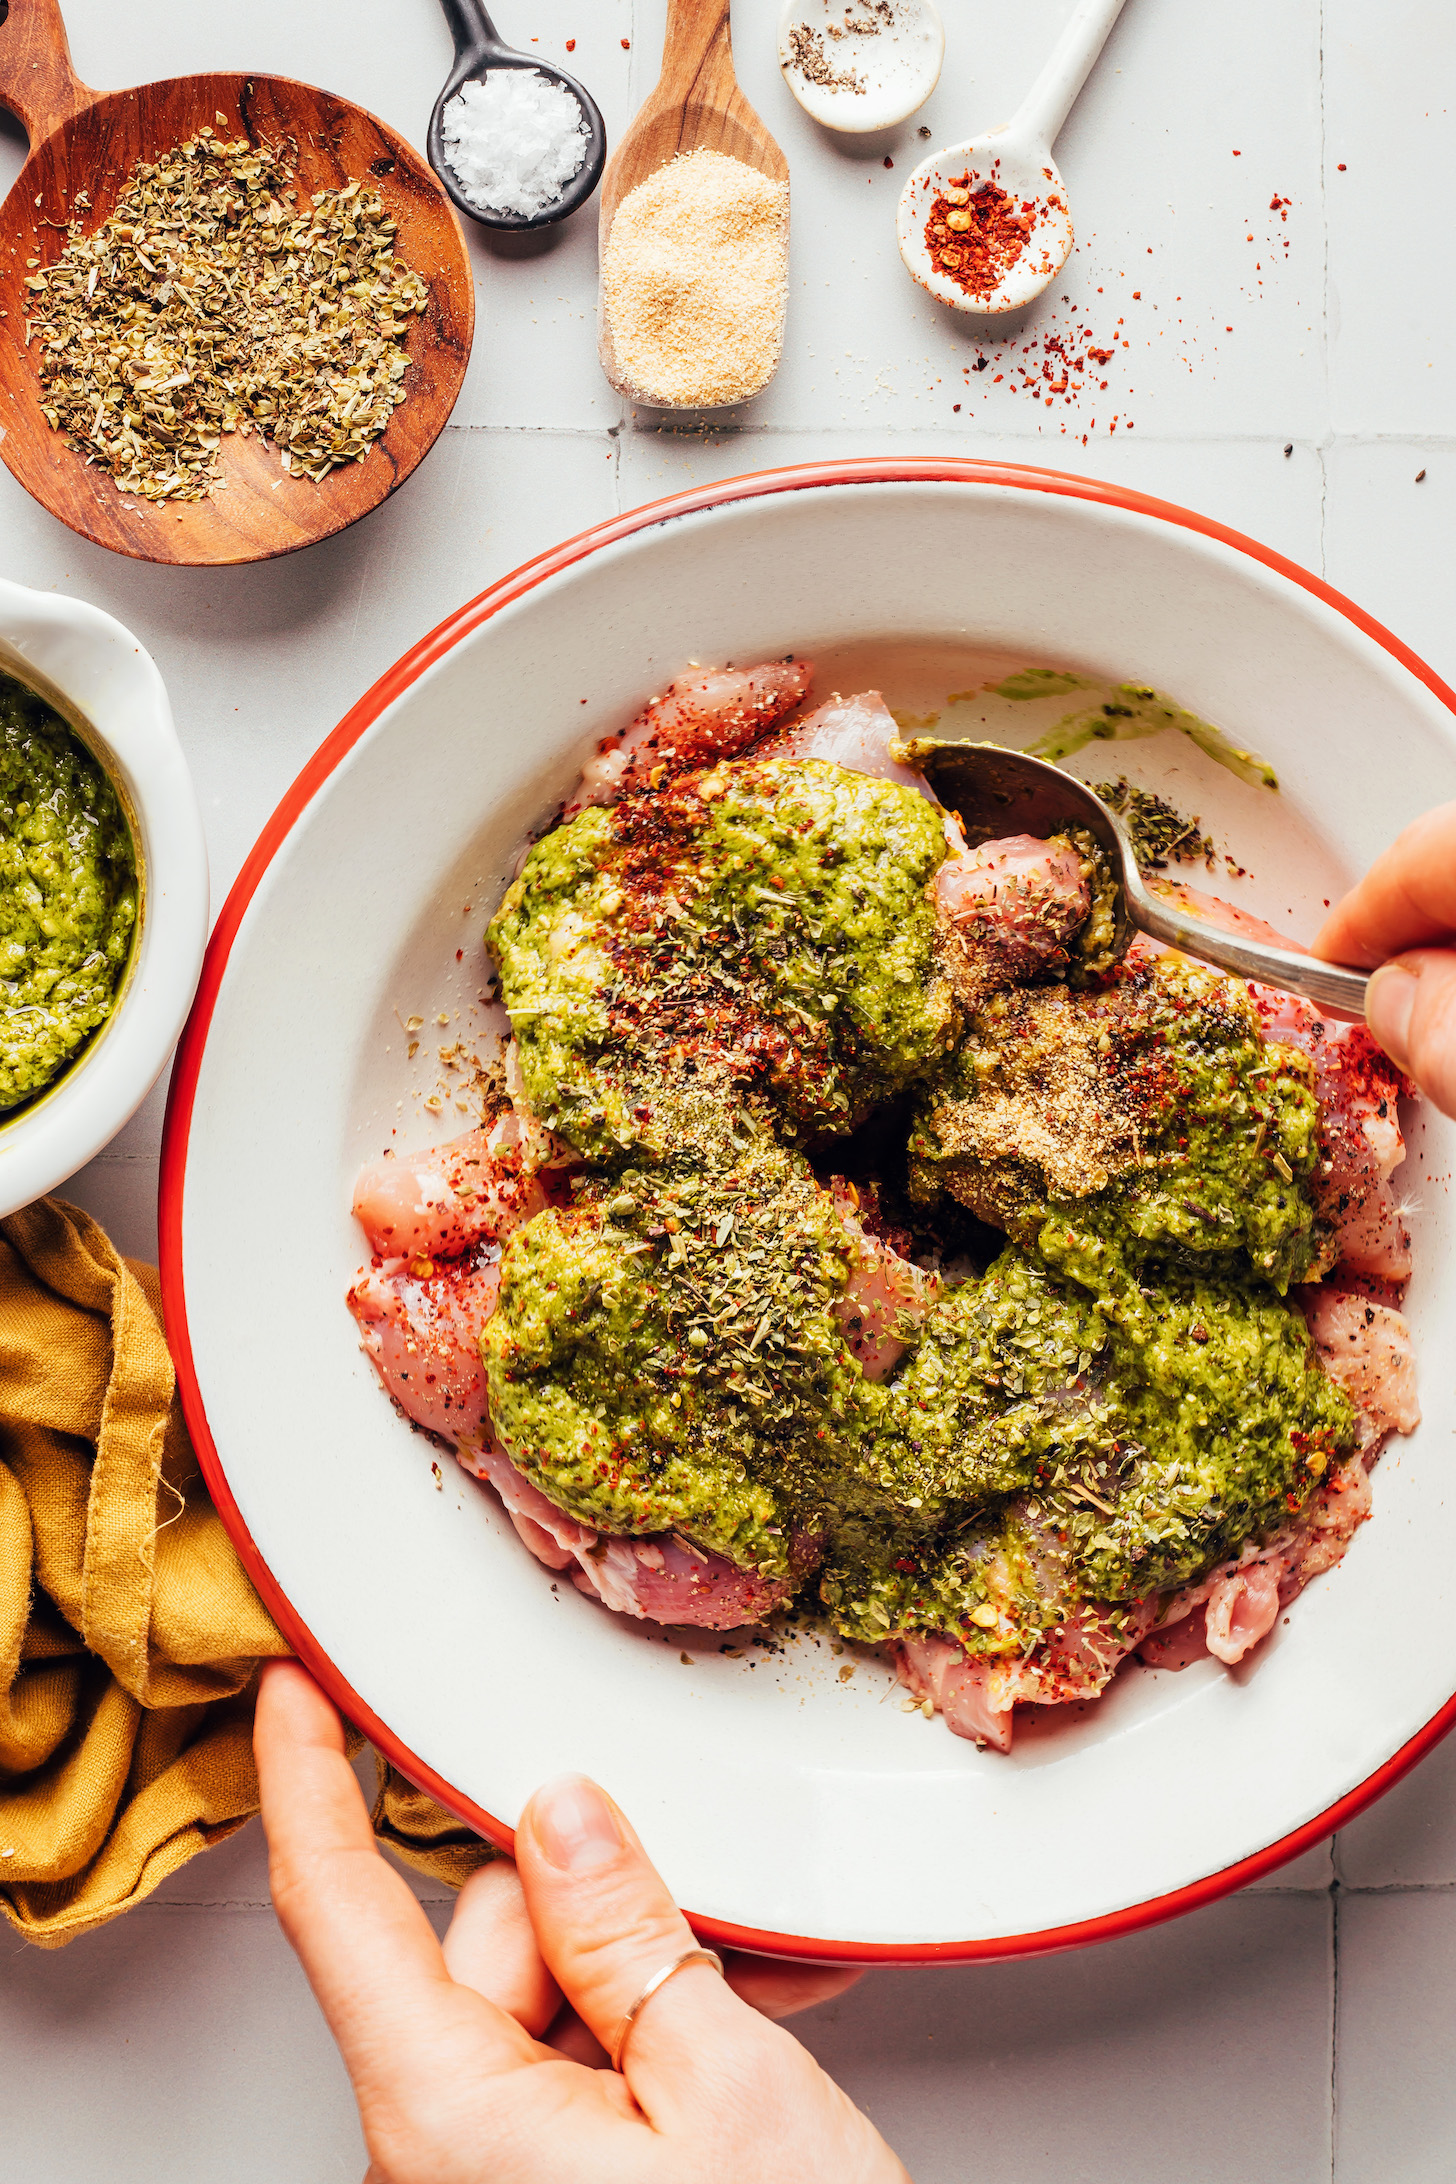
Mixing pesto, dried Italian herbs, red pepper flakes, and chicken thighs in a bowl

Next, we sear the chicken in a cast iron skillet to create a golden brown exterior that seals in its juiciness. Another 5-10 more minutes in the oven and it’s cooked through. Letting it rest for an additional 5 minutes out of the oven allows the meat to reabsorb its juices, leaving you with tender, perfectly cooked chicken!

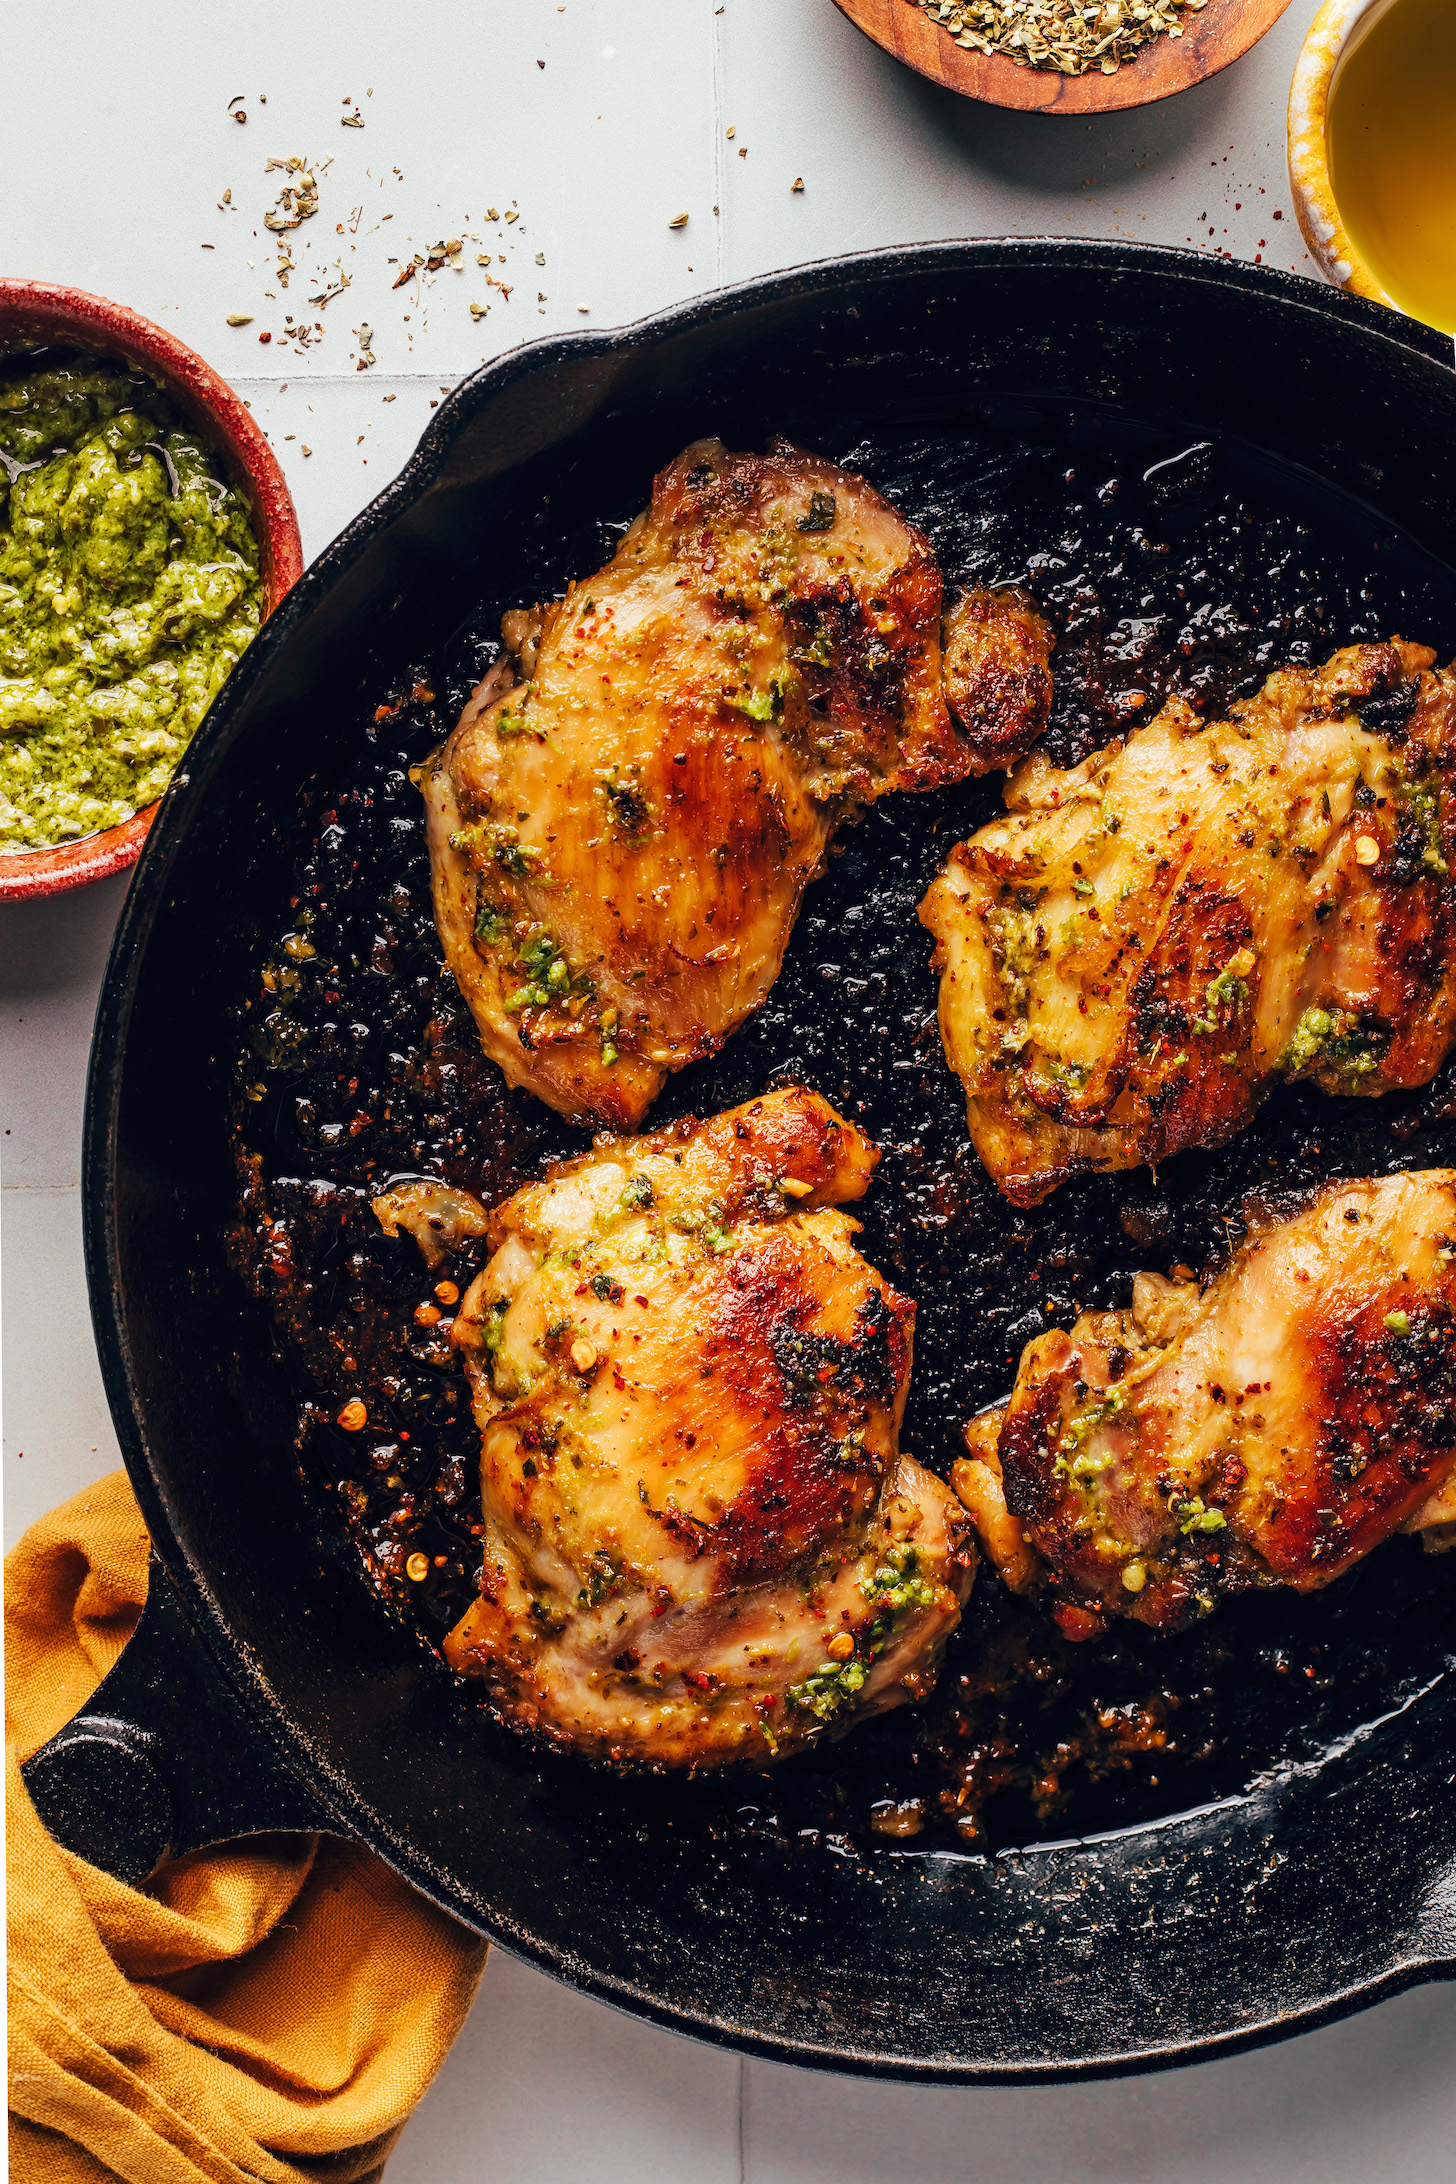
Golden brown chicken thighs in a cast iron skillet

We hope you LOVE this pesto chicken! It’s:

Herby
Garlicky
A little spicy
Savory
Juicy on the inside
Golden on the outside
& SO versatile!

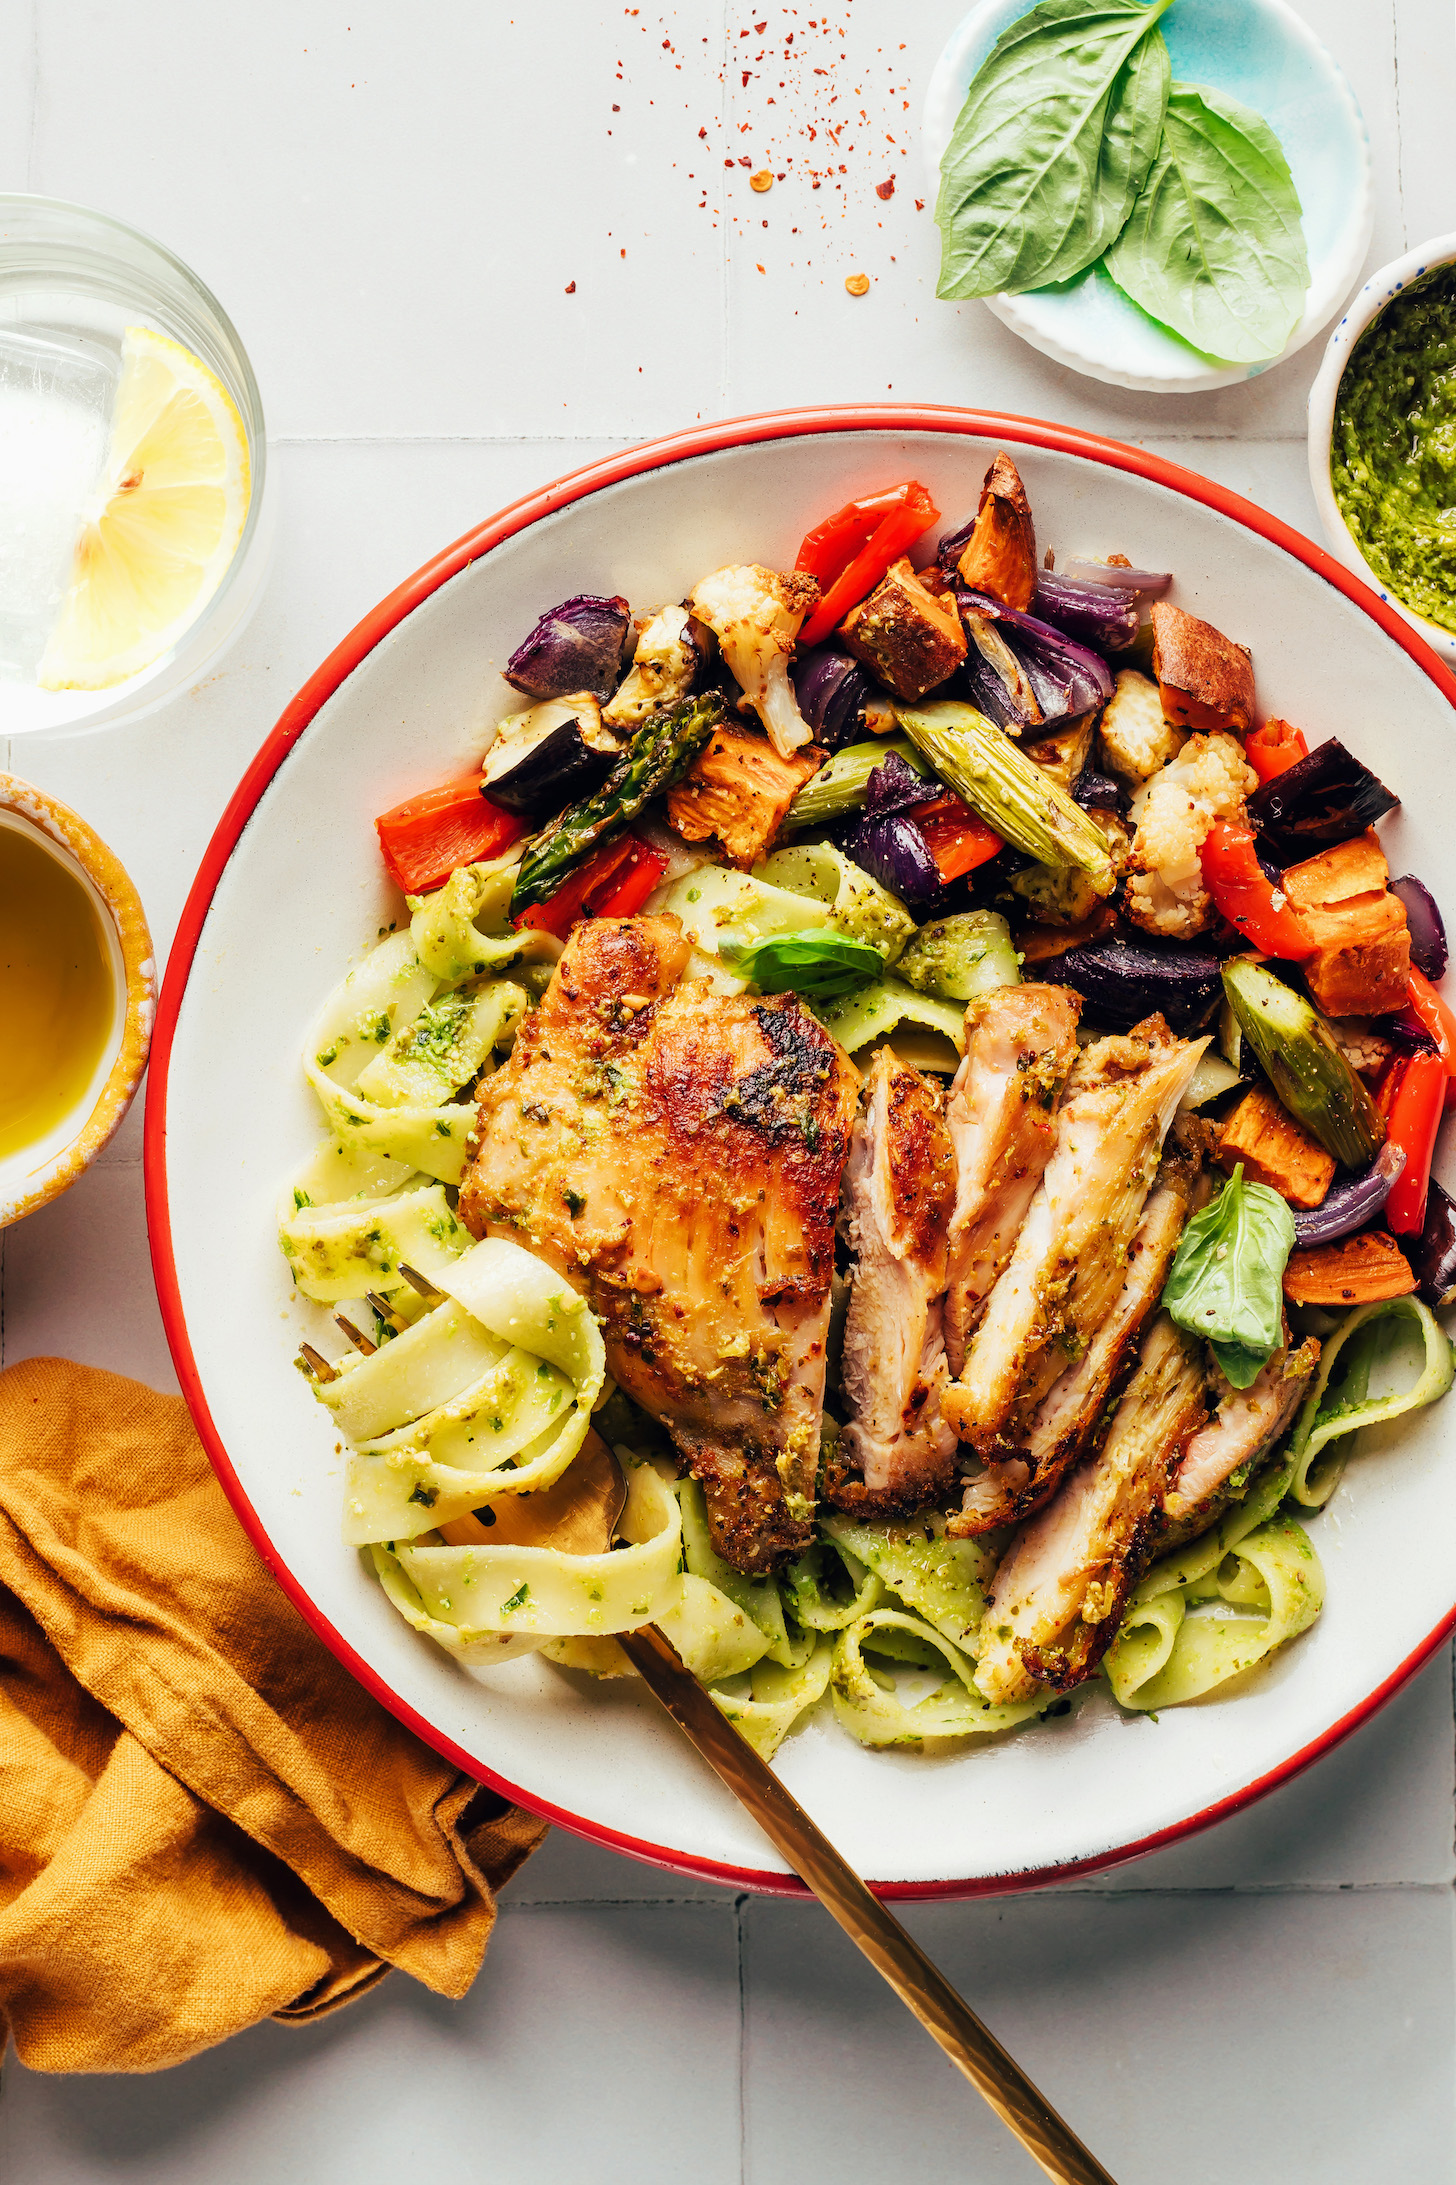
This dish is a great staple entrée to have in your rotation because it pairs well with almost anything! It’s delicious with roasted veggies (potatoes, eggplant, and/or asparagus), pesto pasta salad, green salads, and so much more.

More Easy, Satisfying Entrées

If you try this recipe, let us know! Leave a comment, rate it, and don’t forget to tag a photo @minimalistbaker on Instagram. Cheers, friends!

Pesto pasta swirled on a fork next to a pesto chicken thigh and roasted vegetables

Prep Time 5 minutes

Cook Time 15 minutes

Total Time 20 minutes

Servings 4 (Chicken thighs)

Course Entrée

Cuisine Dairy-Free, Gluten-Free

Freezer Friendly No

Does it keep? 2-3 Days

Prevent your screen from going dark

  • 4 (~6 oz. each) boneless, skinless chicken thighs (organic, pasture-raised when possible // four thighs are ~1 ½ lbs // bone in, skin on also work)
  • 1 tsp garlic powder
  • 2 tsp dried Italian herb blend (or dried oregano + basil)
  • 1/4 tsp sea salt
  • 1/2 tsp black pepper
  • 1/2 tsp red pepper flakes (omit/reduce for less heat)
  • 3-4 Tbsp basil pesto (store-bought* or homemade // dairy-free as needed)
  • 2 tsp olive oil (use less for skin-on chicken thighs)
  • Preheat oven to 375 degrees F (190 C) and set out a large cast iron skillet (10-12 inch).
  • To a mixing bowl, add the chicken thighs, garlic powder, dried Italian herbs, salt, pepper, red pepper flakes, and pesto. Mix well until evenly coated, adding 1 Tbsp more pesto if using homemade (it’s not usually as concentrated in flavor).

  • Heat the cast iron skillet over medium-high heat. Add oil and wait 1 minute for it to get hot. Add chicken thighs (skin side down if using skin-on) and cook until golden brown on the underside, about 3-4 minutes. Then flip and cook for 2-3 minutes more.

  • Once browned on both sides, carefully transfer the skillet to the oven (using an oven mitt) and bake until the internal temperature reads 170F / 76C (make sure to insert into the center and not hit bone for an accurate reading) — about 5-10 minutes, depending on the size of your chicken thighs.

  • Remove from the oven and let rest in the pan for ~5 minutes before serving.

  • Best when fresh, though leftovers will keep covered in the refrigerator for up to 2-3 days. Reheat in the oven or microwave until hot. Not freezer friendly.

*Store-bought dairy-free pestos we’ve tried and enjoy: Gotham Greens Vegan Pesto, Le Grand Garden Pesto, and Trader Joe’s Vegan Kale, Cashew & Basil Pesto.
*We prefer searing on the stovetop before baking for best flavor and texture. Cooking on the stovetop only doesn’t work as well because the exterior is prone to burning before the chicken is cooked through.
*If you want to bake only and skip searing on the stovetop, you can place the seasoned chicken thighs on a foil or parchment-lined baking sheet sprayed/rubbed with oil. Bake at 425 F / 218 C for 20-30 minutes, flipping halfway through, until the internal temperature reads 170 F / 76C (make sure to insert into the center for an accurate reading). They don’t get as crispy but are still delicious!
*Loosely adapted from our Pesto “Parmesan” Turkey Meatballs.
*Nutrition information is a rough estimate calculated with boneless skinless thighs and the lesser amounts where ranges are provided.

Serving: 1 serving Calories: 248 Carbohydrates: 2.4 g Protein: 35 g Fat: 11 g Saturated Fat: 2.1 g Polyunsaturated Fat: 2.1 g Monounsaturated Fat: 5.4 g Trans Fat: 0 g Cholesterol: 144 mg Sodium: 366 mg Potassium: 503 mg Fiber: 0.9 g Sugar: 0.2 g Vitamin A: 123 IU Vitamin C: 2.5 mg Calcium: 26 mg Iron: 2.3 mg


Source link

Daily Dose of Insights

Get a daily infusion of knowledge with our latest blog updates.

We don’t spam! Read our privacy policy for more info.